
22 Easy Summer Nail Designs 2024: Step-by-Step Art Ideas for Beginners
When it comes to nail designs, summer 2024 is all about embracing creativity, simplicity, and vibrancy. Have you ever wondered how to achieve those stunning nail designs you see on social media without spending hours in a salon? What if I told you that with a few easy steps, you could recreate these trendy looks at home? In this article, we’ll explore a variety of easy summer nail designs 2024, perfect for all skill levels, from beginners to seasoned nail art enthusiasts. Whether you prefer short, polygel, or gel nails, we’ve got you covered with step-by-step instructions, making nail art simple.
Minimalist Dot Manicure
This easy summer nail design 2024 features a minimalist approach with a nude base and tiny blue dots aligned at the cuticle. The simplicity and elegance make it perfect for both casual and professional settings. The nails are kept short, making this design ideal for those who prefer a low-maintenance yet chic look. The blue dots add a pop of color without overwhelming the design, embodying the spirit of beginners simple nail art ideas.

Materials Needed:
- Nude nail polish (e.g., Essie “Ballet Slippers”)
- Blue nail polish (e.g., OPI “Infinite Shine” in blue)
- Dotting tool or toothpick
- Top coat (e.g., Seche Vite Dry Fast Top Coat)
- Base coat (e.g., OPI Nail Envy)
Step-by-Step Instructions:
- Apply a base coat to protect your natural nails.
- Once dry, apply two coats of nude polish.
- Using a dotting tool dipped in blue polish, create small dots along the cuticle line.
- Allow the dots to dry completely, then apply a top coat to seal and protect your design.
Coral and Blue Dots
This design incorporates a playful mix of coral and blue dots on a nude base. The dots are strategically placed near the cuticles and tips, creating a modern and trendy look. This design is perfect for beginners and offers a fun way to experiment with colors while keeping the overall look simple and cute.

Materials Needed:
- Nude nail polish (e.g., OPI “Bubble Bath”)
- Coral nail polish (e.g., Essie “Tart Deco”)
- Blue nail polish (e.g., OPI “Rich Girls & Po-Boys”)
- Dotting tool
- Top coat
- Base coat
Step-by-Step Instructions:
- Apply a base coat to your nails.
- Paint your nails with two coats of nude polish.
- Use a dotting tool to place coral and blue dots near the cuticles and tips.
- Allow the design to dry completely, then apply a top coat for a glossy finish.
Pastel French Tips
This design combines classic French tips with a modern twist, using pastel colors instead of the traditional white. Each nail features a different pastel shade, creating a playful and vibrant look perfect for summer 2024. The design is simple yet stylish, making it a great option for beginners.

Materials Needed:
- Pastel nail polishes (e.g., Essie “Mint Candy Apple,” “Fiji,” “Lilacism,” “Lemonade,” “Peach Side Babe”)
- White nail polish (for the base)
- Striping tape or French tip guides
- Top coat
- Base coat
Step-by-Step Instructions:
- Apply a base coat to your nails.
- Paint each nail with a white base polish.
- Once dry, place striping tape or French tip guides at the tips of your nails.
- Paint each tip with a different pastel color.
- Remove the tape carefully, then apply a top coat for a smooth finish.
Neon Coral Nails
Bright and bold, these neon coral nails are perfect for making a statement this summer. The vibrant color is eye-catching and exudes energy and fun. This design is perfect for beginners looking for a simple yet striking nail art idea.

Materials Needed:
- Neon coral nail polish (e.g., China Glaze “Flip Flop Fantasy”)
- Top coat
- Base coat
Step-by-Step Instructions:
- Apply a base coat to your nails.
- Paint two coats of neon coral polish for full opacity.
- Finish with a top coat to add shine and longevity to your manicure.
Geometric Purple Nails
This design features various shades of purple, combined in geometric patterns for a sophisticated and stylish look. It’s perfect for those who love art and want to try something new and trendy. The mix of matte and glossy finishes adds depth and dimension to the nails.

Materials Needed:
- Dark purple nail polish (e.g., Essie “Sexy Divide”)
- Light purple nail polish (e.g., OPI “Do You Lilac It?”)
- Matte top coat
- Glossy top coat
- Striping tape
Step-by-Step Instructions:
- Apply a base coat to your nails.
- Paint your nails with the dark purple polish.
- Once dry, use striping tape to create geometric patterns.
- Paint over the tape with the light purple polish.
- Remove the tape carefully, then apply a matte top coat to some nails and a glossy top coat to others for contrast.
Cloudy Sky Nails
The cloudy sky nail design captures the serene beauty of a summer sky. With a soft blue base and delicate white cloud accents, this look is both dreamy and refreshing. Perfect for beginners, the Almond shape enhances the natural elegance of the nails, making this design a go-to for a sophisticated summer look.

Materials Needed:
- Light blue nail polish (e.g., Essie “Bikini So Teeny”)
- White nail polish (e.g., OPI “Alpine Snow”)
- Small nail art brush or toothpick
- Top coat
- Base coat
Step-by-Step Instructions:
- Start with a base coat to protect your nails.
- Apply two coats of light blue polish for a smooth background.
- Using a small brush or toothpick, create cloud shapes with white polish on each nail.
- Allow the design to dry completely, then apply a top coat to seal and protect the art.
Pastel Perfection
This pastel nail design features a soft and gentle color palette perfect for the summer season. Each nail is painted in a different pastel hue, creating a harmonious and elegant look. This design is ideal for beginners simple art ideas and offers a fresh, vibrant feel.

Materials Needed:
- Pastel nail polishes (e.g., Essie “Mint Candy Apple,” “Fiji,” “Lilacism,” “Lemonade,” “Peach Side Babe”)
- Top coat
- Base coat
Step-by-Step Instructions:
- Apply a base coat to your nails.
- Paint each nail with a different pastel shade.
- Once the polish is dry, apply a top coat for a glossy finish.
Ombre Aqua Nails
The ombre aqua nails feature a gradient effect transitioning from a soft lavender to a refreshing turquoise. This design is perfect for summer 2024 and adds a touch of elegance to any outfit. The subtle shimmer gives it a mesmerizing look, ideal for those who love a bit of sparkle.

Materials Needed:
- Lavender nail polish (e.g., OPI “Do You Lilac It?”)
- Turquoise nail polish (e.g., Essie “Turquoise & Caicos”)
- Makeup sponge
- Top coat
- Base coat
Step-by-Step Instructions:
- Start with a base coat to protect your nails.
- Paint a base layer of lavender polish.
- On a makeup sponge, apply both lavender and turquoise polishes, slightly overlapping.
- Dab the sponge onto your nails to create the ombre effect.
- Apply a top coat to blend the colors and add shine.
Neon French Tips
This design reinvents the classic French manicure with a vibrant twist. Featuring neon pink and orange tips, it’s a bold and playful look perfect for summer. The neon colors add a fun, modern edge to the traditional style, making it ideal for beginners who want to try something new.

Materials Needed:
- Nude or light pink base polish (e.g., Essie “Ballet Slippers”)
- Neon pink and orange nail polishes (e.g., China Glaze “Flip Flop Fantasy” and “Orange Knockout”)
- French tip guides or striping tape
- Top coat
- Base coat
Step-by-Step Instructions:
- Apply a base coat to your nails.
- Paint your nails with the nude or light pink base polish.
- Once dry, place French tip guides on the tips of your nails.
- Paint the tips with neon pink and orange polishes.
- Remove the guides and apply a top coat for a smooth finish.
Elegant Silver Swirls
The elegant silver swirls design combines a classic nude base with delicate silver swirls, creating a sophisticated and timeless look. Perfect for both everyday wear and special occasions, this design is easy to achieve and looks incredibly chic.

Materials Needed:
- Nude nail polish (e.g., OPI “Samoan Sand”)
- Silver nail polish (e.g., Essie “No Place Like Chrome”)
- Nail art brush or striping tape
- Top coat
- Base coat
Step-by-Step Instructions:
- Start with a base coat to protect your nails.
- Apply two coats of nude polish for a smooth background.
- Using a nail art brush or striping tape, create delicate silver swirls on each nail.
- Allow the design to dry completely, then apply a top coat to seal and protect your art.
Swirl Design
This easy summer nail design 2024 features vibrant swirls in pink, blue, and silver on a nude base, creating a lively and dynamic look. The swirls give an illusion of movement, making your nails look artistic and trendy. This design is perfect for beginners simple do it at home, adding a touch of creativity to your summer style.

Materials Needed:
- Nude nail polish (e.g., OPI “Samoan Sand”)
- Pink, blue, and silver nail polishes (e.g., Essie “Madison Ave-Hue,” “Bikini So Teeny,” and “No Place Like Chrome”)
- Fine nail art brush
- Top coat
- Base coat
Step-by-Step Instructions:
- Apply a base coat to protect your nails.
- Paint your nails with a nude polish.
- Using a fine brush, create swirls with pink, blue, and silver polishes.
- Allow the swirls to dry completely, then apply a top coat to seal and protect the design.
Tropical Flower Nails
This design brings the tropics to your fingertips with bold yellow tips and striking red hibiscus flowers. Perfect for summer, this flower design adds a pop of color and a tropical vibe to your nails. The Almond shape enhances the elegant look, making it a great choice for vacations or beach outings.

Materials Needed:
- Nude base polish (e.g., OPI “Samoan Sand”)
- Yellow nail polish (e.g., China Glaze “Happy Go Lucky”)
- Red nail polish (e.g., Essie “A List”)
- Fine nail art brush
- Top coat
- Base coat
Step-by-Step Instructions:
- Apply a base coat to your nails.
- Paint your nails with a nude base polish.
- Create yellow tips on each nail.
- Using a fine brush, draw red hibiscus flowers.
- Finish with a top coat to add shine and protect the design.
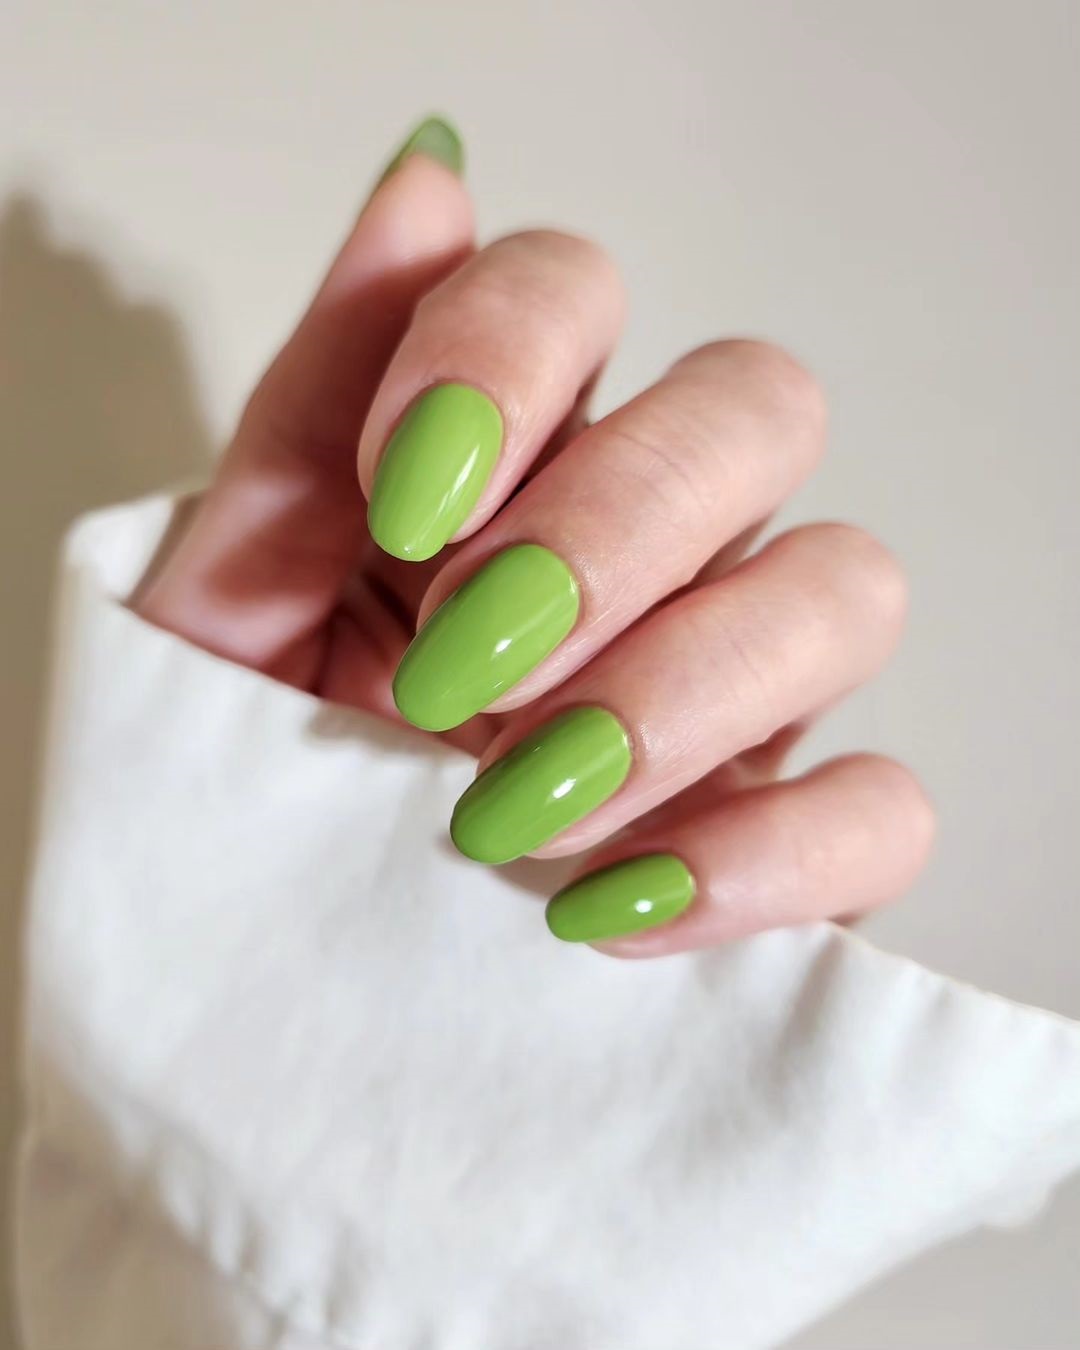
Vibrant Green Nails
Bright and fresh, these vibrant green nails are perfect for making a statement this summer. The solid green color is bold and eye-catching, making it a great choice for those who love simple yet striking nail designs. This look is perfect for beginners simple to recreate at home.

Materials Needed:
- Vibrant green nail polish (e.g., Essie “Mojito Madness”)
- Top coat
- Base coat
Step-by-Step Instructions:
- Apply a base coat to your nails.
- Paint two coats of vibrant green polish for full coverage.
- Finish with a top coat to add shine and longevity to your manicure.
Classic French Manicure with a Twist
This design puts a modern twist on the classic French manicure with soft yellow tips and delicate white flower accents. It’s a fresh and elegant look perfect for any occasion. The short nails make this design ideal for those who prefer a subtle yet stylish manicure.
Materials Needed:
- Nude or light pink base polish (e.g., OPI “Bubble Bath”)
- Soft yellow nail polish (e.g., Zoya “Bee”)
- White nail polish (e.g., OPI “Alpine Snow”)
- Fine nail art brush
- Top coat
- Base coat
Step-by-Step Instructions:
- Apply a base coat to your nails.
- Paint your nails with the nude or light pink base polish.
- Create soft yellow tips on each nail.
- Using a fine brush, add delicate white flower accents.
- Apply a top coat to seal and protect the design.
Neon Pink Nails
Bold and vibrant, these neon pink nails are perfect for making a statement. The bright color is both fun and fashionable, making it ideal for summer parties and festivals. This design is perfect for those who love simple yet impactful nail art.

Materials Needed:
- Neon pink nail polish (e.g., China Glaze “Pink Voltage”)
- Top coat
- Base coat
Step-by-Step Instructions:
- Apply a base coat to your nails.
- Paint two coats of neon pink polish for maximum brightness.
- Finish with a top coat to add shine and longevity to your manicure.
Leopard Print French Tips
This bold and chic design features leopard print French tips on a soft pink base. It’s a modern twist on the classic French manicure, adding a touch of wild elegance to your nails. This look is perfect for those who want to make a statement with their manicure while keeping it stylish and sophisticated.

Materials Needed:
- Soft pink nail polish (e.g., Essie “Ballet Slippers”)
- Black and brown nail polishes (e.g., OPI “Black Onyx” and “Chocolate Moose”)
- Fine nail art brush
- French tip guides
- Top coat
- Base coat
Step-by-Step Instructions:
- Apply a base coat to your nails.
- Paint your nails with a soft pink polish.
- Once dry, place French tip guides on the tips of your nails.
- Using the fine brush, create leopard print patterns with black and brown polishes on the tips.
- Remove the guides and apply a top coat to seal and protect your design.
Neon Splatter Nails
This design features a bright neon pink base with black splatter accents, creating a fun and edgy look perfect for summer. The bold colors and abstract pattern make this design stand out, ideal for parties and festivals.

Materials Needed:
- Neon pink nail polish (e.g., China Glaze “Pink Voltage”)
- Black nail polish (e.g., Essie “Licorice”)
- Splatter brush or toothbrush
- Top coat
- Base coat
Step-by-Step Instructions:
- Apply a base coat to your nails.
- Paint your nails with two coats of neon pink polish.
- Dip the splatter brush or toothbrush in black polish and flick it over your nails to create the splatter effect.
- Allow the splatters to dry completely, then apply a top coat to protect your design.
Yellow and White Geometric Nails
This design combines bright yellow and white polish in a geometric pattern, creating a fresh and modern look. The bold yellow is perfect for summer, while the geometric shapes add a touch of sophistication.

Materials Needed:
- Yellow nail polish (e.g., Zoya “Bee”)
- White nail polish (e.g., OPI “Alpine Snow”)
- Striping tape or nail vinyls
- Top coat
- Base coat
Step-by-Step Instructions:
- Apply a base coat to your nails.
- Paint your nails with two coats of yellow polish.
- Once dry, use striping tape or nail vinyls to create geometric shapes.
- Paint the exposed areas with white polish.
- Remove the tape carefully, then apply a top coat for a smooth finish.
Metallic Accents on White
This elegant design features white nails with delicate metallic accents, creating a sleek and stylish look. The combination of white and metallic gives a sophisticated edge, perfect for both everyday wear and special occasions.

Materials Needed:
- White nail polish (e.g., Essie “Blanc”)
- Metallic nail polish (e.g., Sally Hansen “Color Foil Silver”)
- Fine nail art brush
- Top coat
- Base coat
Step-by-Step Instructions:
- Apply a base coat to your nails.
- Paint your nails with two coats of white polish.
- Using a fine brush, add metallic accents to each nail.
- Allow the design to dry completely, then apply a top coat to seal and protect your art.
Purple Wave Design
This design features purple waves with silver outlines on a nude base, creating a dynamic and eye-catching look. The waves add a sense of movement and flow, making your nails look artistic and trendy.

Materials Needed:
- Nude nail polish (e.g., OPI “Samoan Sand”)
- Purple nail polish (e.g., Essie “Play Date”)
- Silver nail polish (e.g., Essie “No Place Like Chrome”)
- Fine nail art brush
- Top coat
- Base coat
Step-by-Step Instructions:
- Apply a base coat to your nails.
- Paint your nails with a nude polish.
- Using a fine brush, create purple wave patterns on each nail.
- Outline the waves with silver polish.
- Allow the design to dry completely, then apply a top coat to seal and protect your art.
Sunset Ombre Nails
This stunning ombre design features a gradient of pink, coral, and mint, creating a beautiful sunset effect. The soft transitions between colors make this design perfect for summer, evoking a sense of calm and serenity. This look is great for those who love art and want to try something new and trendy.

Materials Needed:
- Pink nail polish (e.g., Essie “Ballet Slippers”)
- Coral nail polish (e.g., OPI “Living on the Bula-vard!”)
- Mint nail polish (e.g., China Glaze “For Audrey”)
- Makeup sponge
- Top coat
- Base coat
Step-by-Step Instructions:
- Apply a base coat to your nails.
- Paint a base layer of pink polish.
- On a makeup sponge, apply pink, coral, and mint polishes in strips, slightly overlapping.
- Dab the sponge onto your nails to create the ombre effect.
- Apply a top coat to blend the colors and add shine.
Matte Pink Nails
These nails feature a simple yet elegant matte pink design. The matte finish adds a sophisticated touch to the vibrant pink color, making it perfect for everyday wear. This look is ideal for those who prefer simple and chic nail designs that are easy to achieve at home.

Materials Needed:
- Pink nail polish (e.g., Essie “Fiji”)
- Matte top coat
- Base coat
Step-by-Step Instructions:
- Apply a base coat to your nails.
- Paint two coats of pink polish for full opacity.
- Finish with a matte top coat to achieve the velvety finish.
Save Pin
