
Are you ready to dive into the vibrant world of summer nail art for 2024? What are the hottest trends to look out for, and how can you recreate these stylish designs at home? Whether you’re planning to hit the beach or just want to spice up your daily look, the right nail art can truly reflect your spirit and style. This article will guide you through some of the freshest and most trendy nail art designs for this upcoming summer, each with its own unique flair and charm.
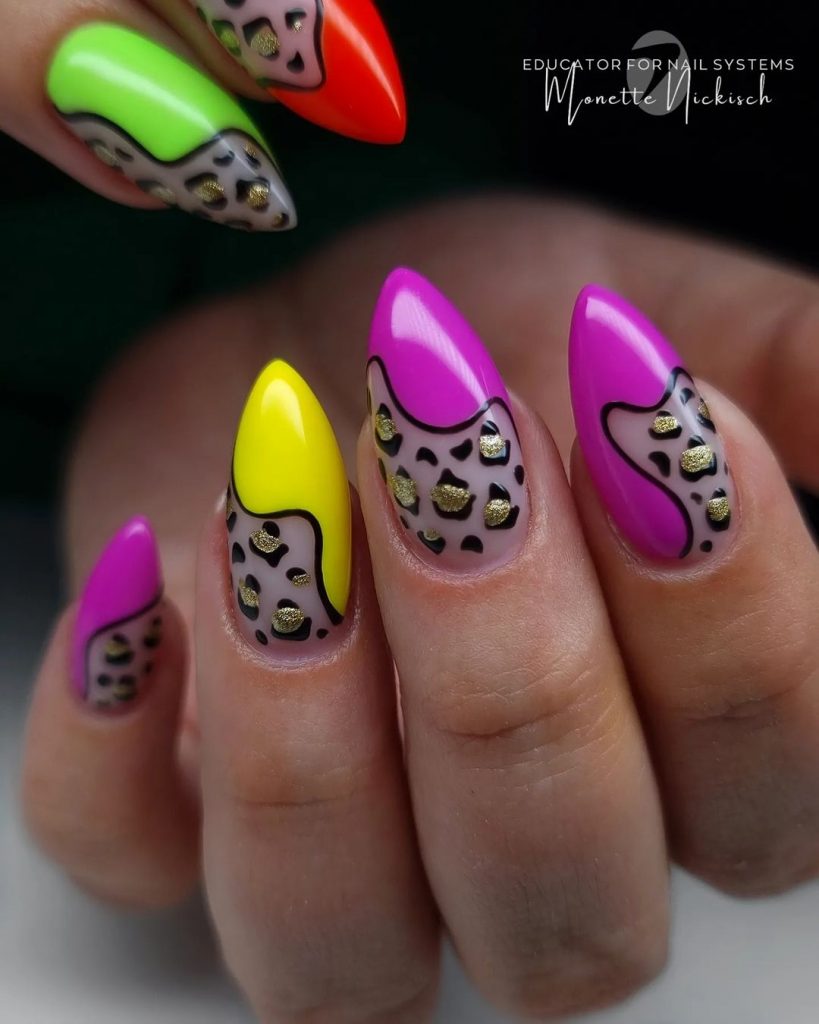
Bold and Bright: A Fusion of Neon and Elegance
This nail design screams summer fun with its bold use of bright pretty colors and dynamic patterns. The vivid neon greens blend seamlessly with soft oranges, creating a look that is both funky and aesthetic. The addition of animal print patterns with gold accents adds a luxurious touch to an otherwise wildly playful design.
Consumables:
-
- Base Coat: OPI Natural Nail Base Coat
- Neon Green Polish: Sally Hansen Xtreme Wear in “Kiwi Bikini”
- Orange Polish: Essie’s “Tart Deco”
- Black Detailing Pen: Nail Art Express Black
- Gold Studs: Micro Pixie Beads
- Top Coat: Seche Vite Dry Fast Top Coat
Creating this design involves applying a bright base coat of neon green, followed by carefully painting on orange tips. Use a thin brush to add animal print details in black, and place gold studs strategically for an added sparkle. Seal everything with a high-quality top coat to ensure longevity.
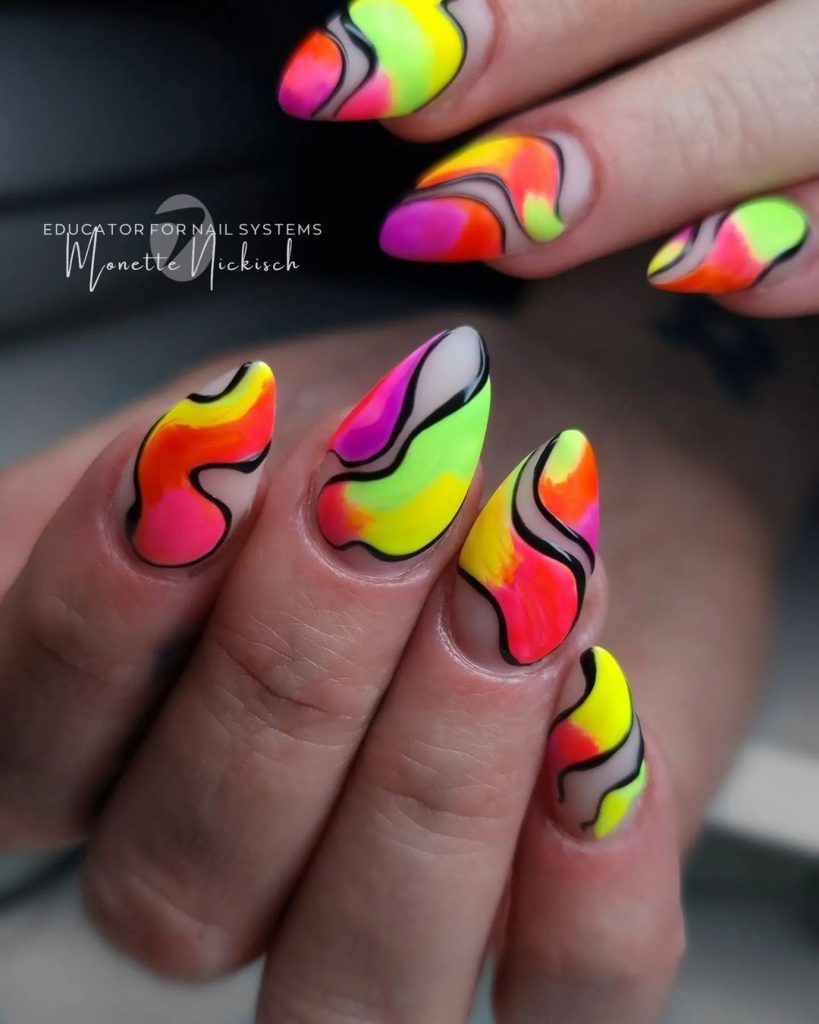
Swirling Elegance: Captivating Neon Waves
The flow of neon colors in this design creates a mesmerizing effect that is perfect for any holiday or beach theme celebration. The swirling patterns in hot pink, orange, yellow, and green not only capture the essence of summer but also showcase an innovative blending technique that can set you apart.
Consumables:
-
- Base Coat: CND Stickey Base Coat
- Neon Polishes: China Glaze Neon Collection
- Black Liner: NYX Professional Makeup Matte Liquid Liner
- Top Coat: Sally Hansen Miracle Gel Top Coat
To achieve these fluid like waves, start with a white base coat to make the colors pop. Use a sponge to dab on the neon polishes in a gradient pattern. Once dry, outline the waves with a black liner to define the shapes. Finish with a glossy top coat for a smooth, durable finish.
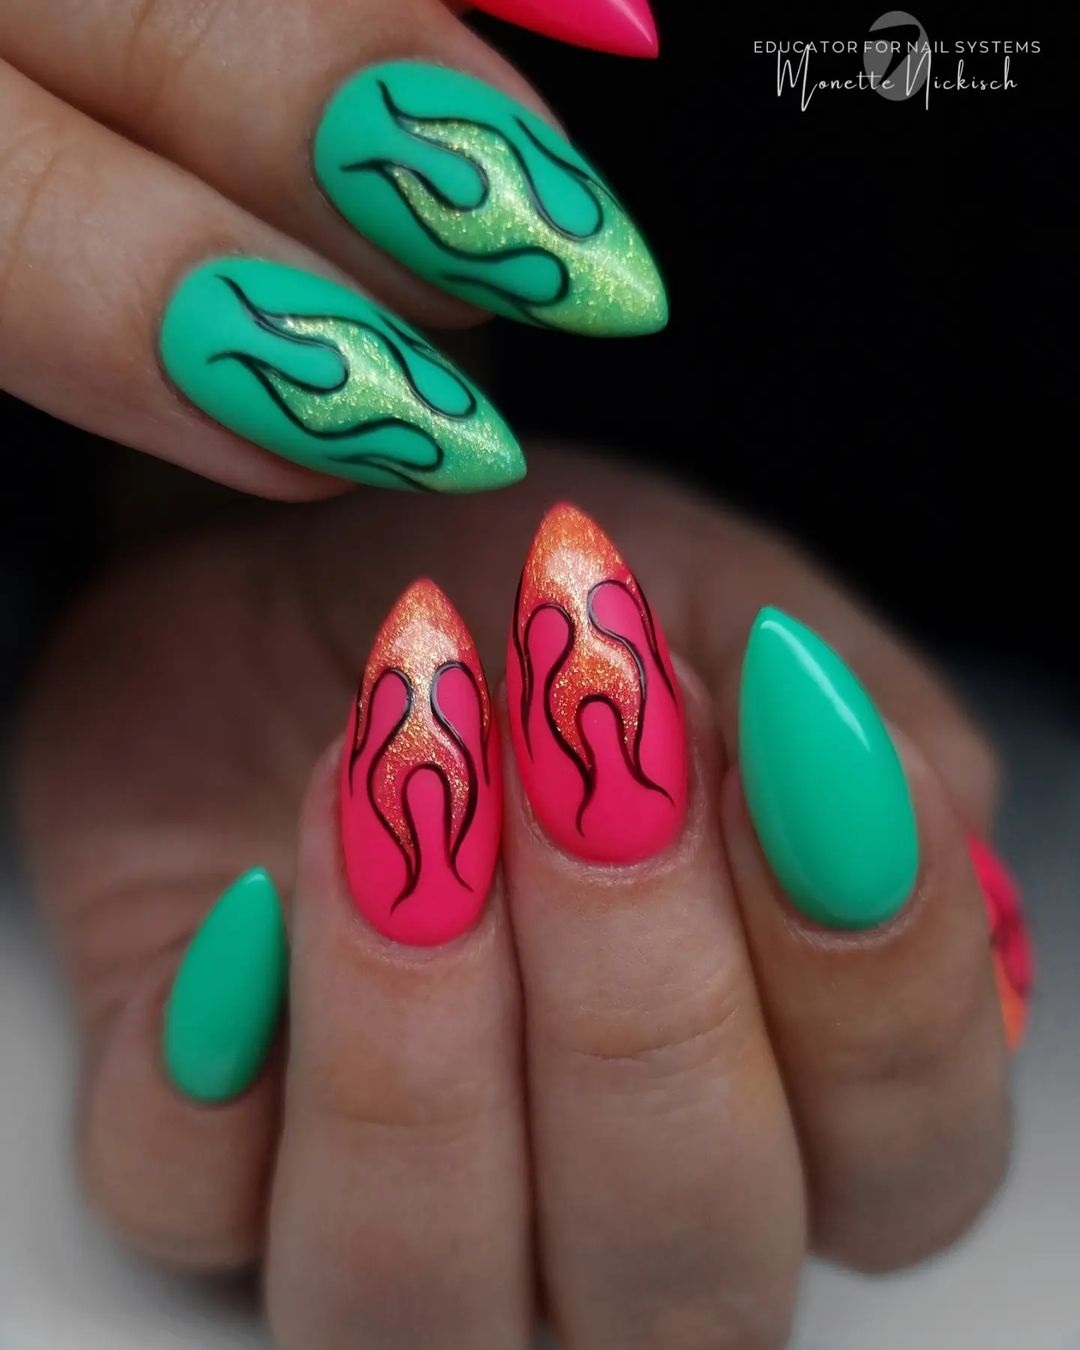
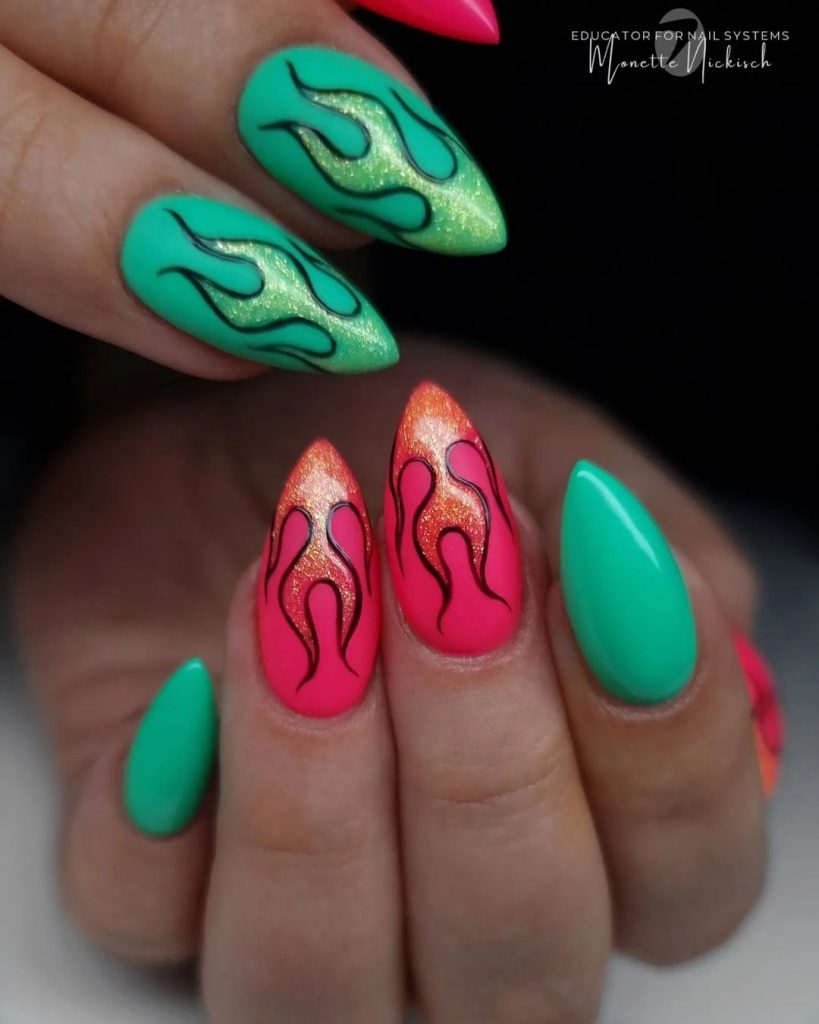
Sparkle and Shine: Coral Flame
This design is inspired by the colors of the ocean, combining light pink and blue shades with a fiery coral that resembles fire. The use of shimmering glitter gives it a festive feel, so it’s perfect for both daytime and evening looks.
Consumables:
-
- Base Coat: Revlon Quick Dry Base Coat
- Seafoam Green Polish: Zoya in “Wednesday”
- Coral Polish: Essie in “Come Here!”
- Glitter Overlay: ORLY Sparkle Collection
- Top Coat: INM Out the Door Top Coat
Begin with a seafoam green base, then sponge on the coral polish toward the tips, creating a flame-like effect. While still tacky, sprinkle a thin layer of glitter over the nails for a sparkling finish. Use a fan brush to remove excess glitter, and seal with a fast-drying top coat.
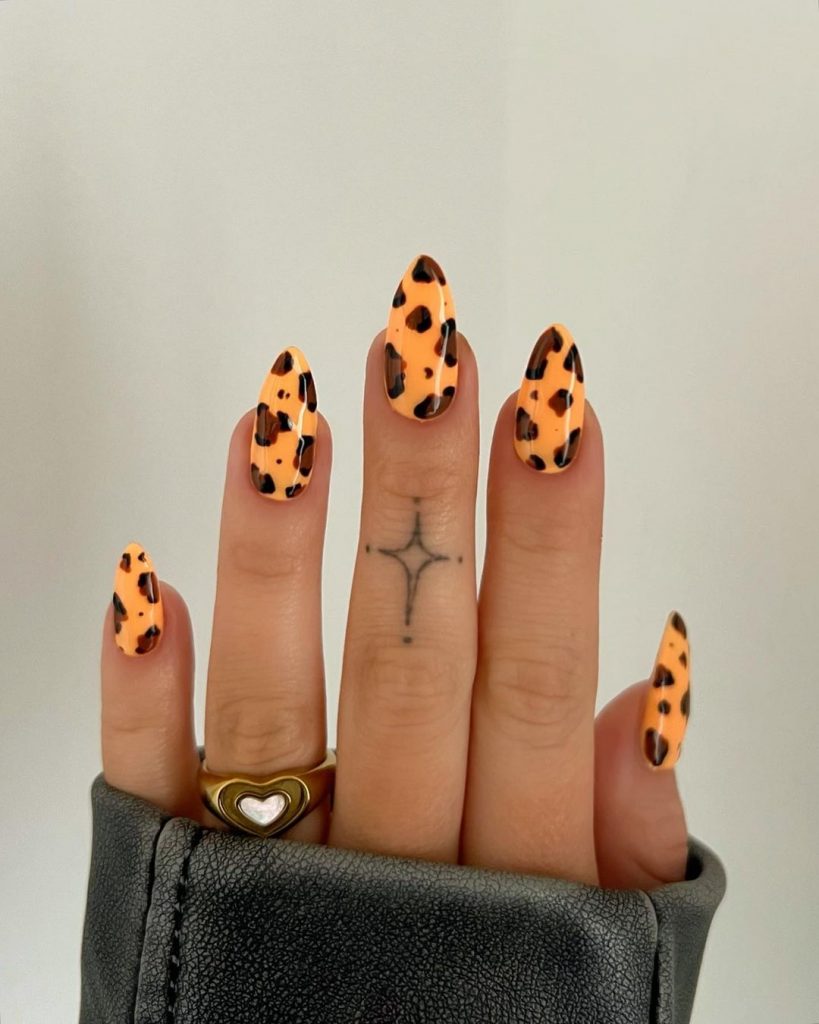
Tropical Paradise: Bold Animal Prints with a Twist
The fourth design features a classic that never goes out of style – animal prints – but with a unique twist perfect for 2024 trends. The orange backdrop paired with black splotches captures the essence of a fiery sunset, making this design both bold and fun.
Consumables:
-
- Base Coat: Butter London Nail Foundation
- Orange Polish: OPI “Hot & Spicy”
- Black Polish: Essie “Licorice”
- Top Coat: Deborah Lippmann Gel Lab Pro
To recreate this wild look, begin with a solid orange base and let it dry completely. Using a fine-tip brush, randomly dot black polish to create the animal print effect. Finish with a high-gloss top coat to enhance the vibrant colors and ensure durability.
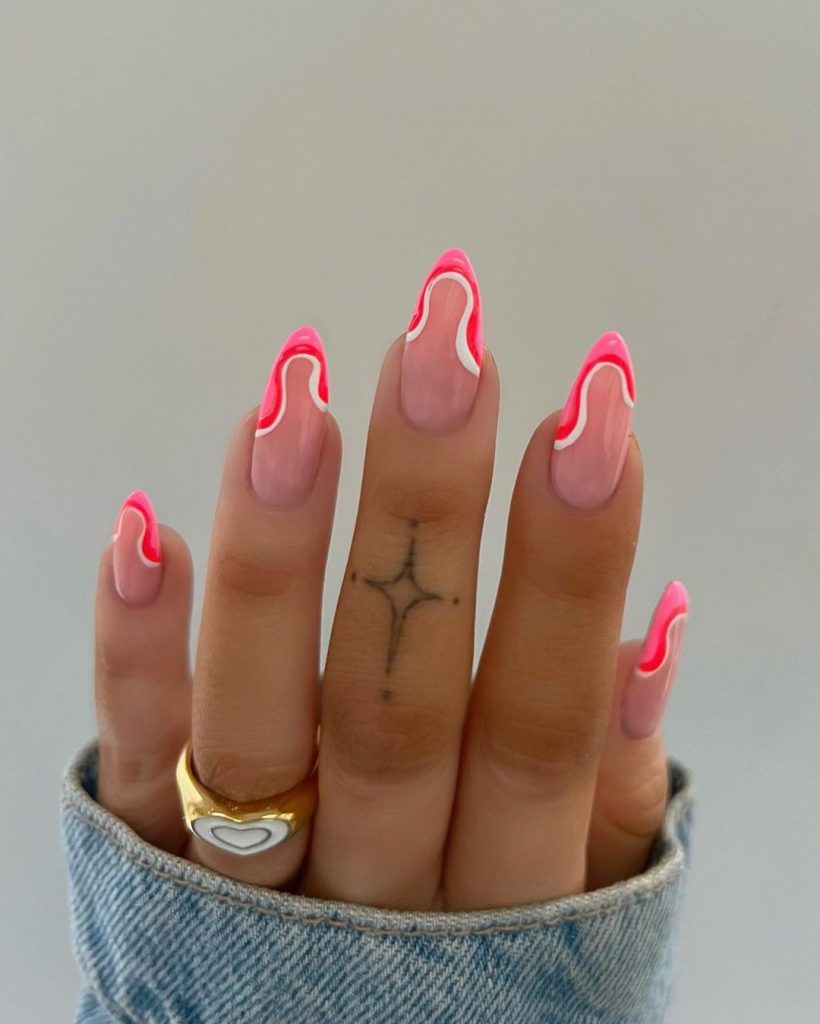
Soft and Subtle: Elegant Light Pink Waves
This design is a testament to the beauty of simplicity and elegance in nail art. The soft light pink waves over a clear base exude sophistication and are perfect for those who prefer a more simple yet chic look. It’s a great choice for any summer wedding or upscale event.
Consumables:
-
- Base Coat: Essie Ridge Filling Base Coat
- Light Pink Polish: Chanel Le Vernis in “Ballerina”
- Detail Brush: Fine Nail Art Brush
- Top Coat: Chanel Le Gel Coat
For this delicate design, apply a clear base coat followed by gentle strokes of light pink polish using a fine brush. The key is to move swiftly to create smooth, flowing lines. A high-quality top coat will add shine and longevity to this graceful look.
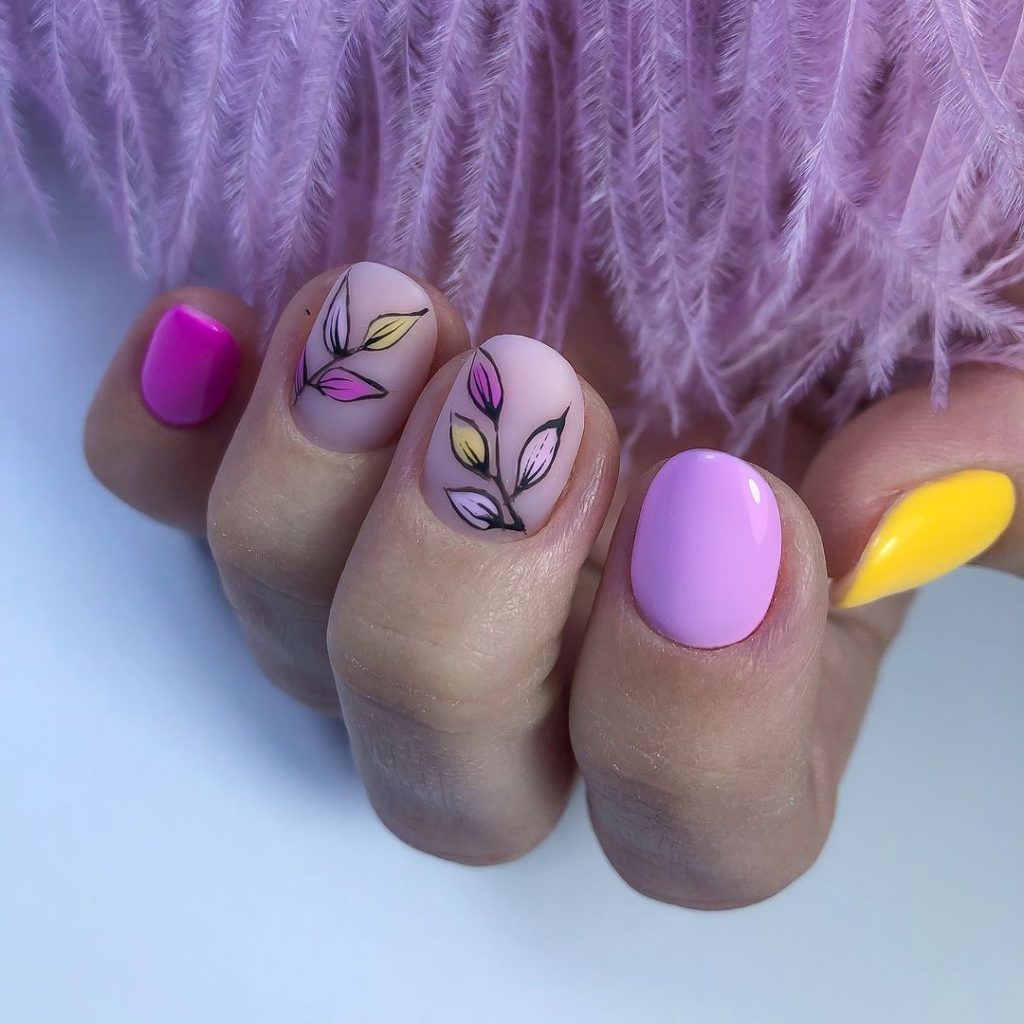
Charming Pastel Florals
This design embodies the quintessential summer vibe with its pastel palette and delicate floral accents. Perfect for any holiday or casual outing, these nails use a blend of light pink and soft yellow to create a serene yet fun aesthetic.
Consumables:
-
- Base Coat: OPI Natural Nail Base Coat
- Pink Polish: Essie “Muchi, Muchi”
- Yellow Polish: OPI “Meet a Boy Cute as Can Be”
- Detailing Brush: Fine tip art brush
- Top Coat: Seche Vite Dry Fast Top Coat
Start with a light pink base on all fingers except for the accent nail, which will be in soft yellow. Using a fine brush, paint delicate petals in contrasting colors on the accent nails. Finish with a clear top coat to protect the design and add a glossy sheen.
Abstract Artistry: Bold Color Splashes
Showcasing an abstract design, this nail art is all about bold color splashes in black, blue, and orange, perfect for someone looking to make a statement. This is a true expression of 2024 trends, where boldness meets artistic flair.

Consumables:
-
- Base Coat: Sally Hansen Double Duty
- White Polish: Sally Hansen Insta-Dri in “White on Time”
- Black, Blue, Orange Polish: Generic brand acrylic paints
- Detailing Brush: Nail art striping brush
- Top Coat: INM Out the Door Super Fast Drying Top Coat
Begin with a white base coat to ensure the colors pop. Dip your striping brush into the various paints and create abstract patterns across each nail. There’s no right or wrong pattern here—let your creativity lead the way. Seal with a fast-drying top coat to maintain the vividness of the design.
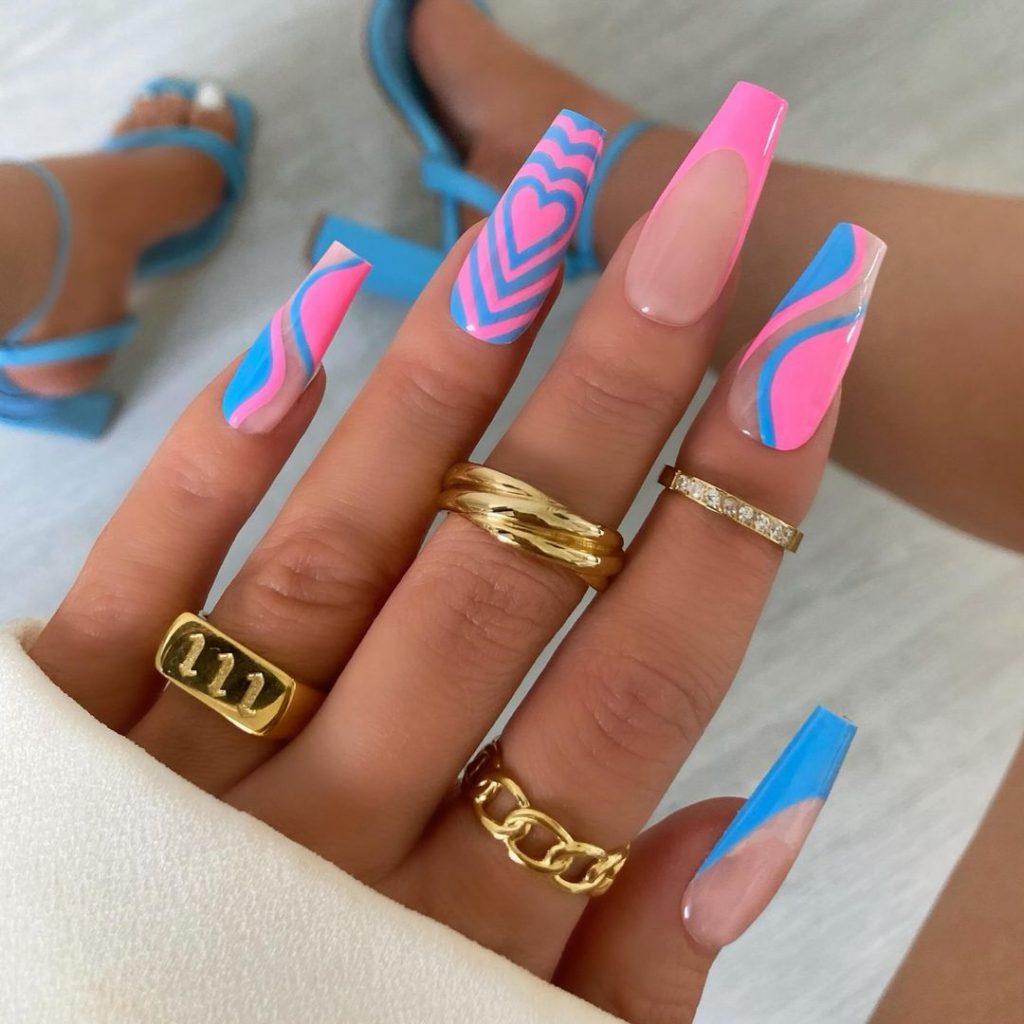
Romantic Hearts and Stripes
This nail design features vibrant blue and pink hues with adorable heart and stripe patterns, making it perfect for beach themes or just adding a pop of color to your everyday style. The playful use of color and design embodies a youthful holiday spirit.
Consumables:
-
- Base Coat: Essie All in One Base
- Pink Polish: Essie “Fiji”
- Blue Polish: China Glaze “Too Yacht to Handle”
- Detailing Tape: Thin striping tape
- Top Coat: OPI Top Coat
Apply a base coat, followed by pink as your base color. For the striped nails, use tape to create sharp lines, then apply the blue polish. For the heart designs, use a small dotting tool or the tip of a brush to shape the hearts carefully. Finish with a top coat for durability and shine.
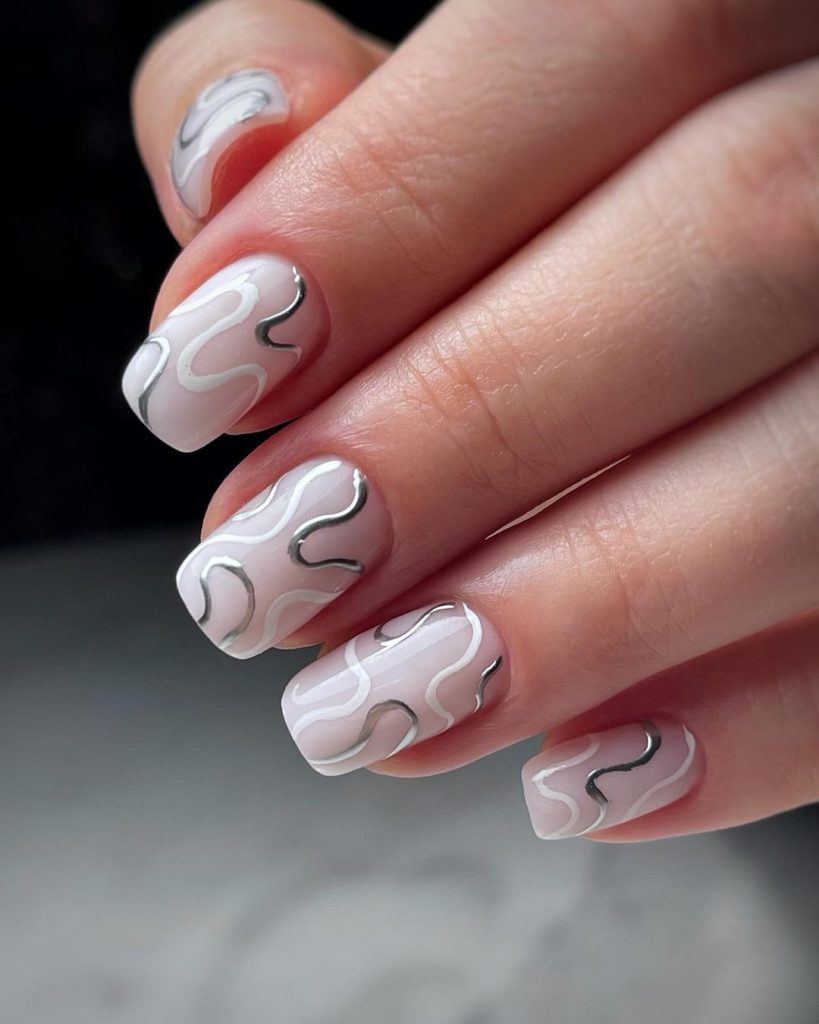
Elegant Swirls in Monochrome
Ideal for those who appreciate a more understated elegance, these nails feature white and gray swirls in a seamless design. This is perfect for simple, yet sophisticated looks that can transition from day to evening.
Consumables:
-
- Base Coat: OPI Natural Nail Base Coat
- White Polish: Essie “Blanc”
- Gray Polish: Essie “Master Plan”
- Detailing Brush: Ultra-fine nail art brush
- Top Coat: Glossy Gel Top Coat
Paint your nails with a white base coat. Using a detailing brush, gently draw swirls with the gray polish, blending slightly where the two colors meet to create a soft gradient effect. A glossy top coat will enhance the smooth finish.
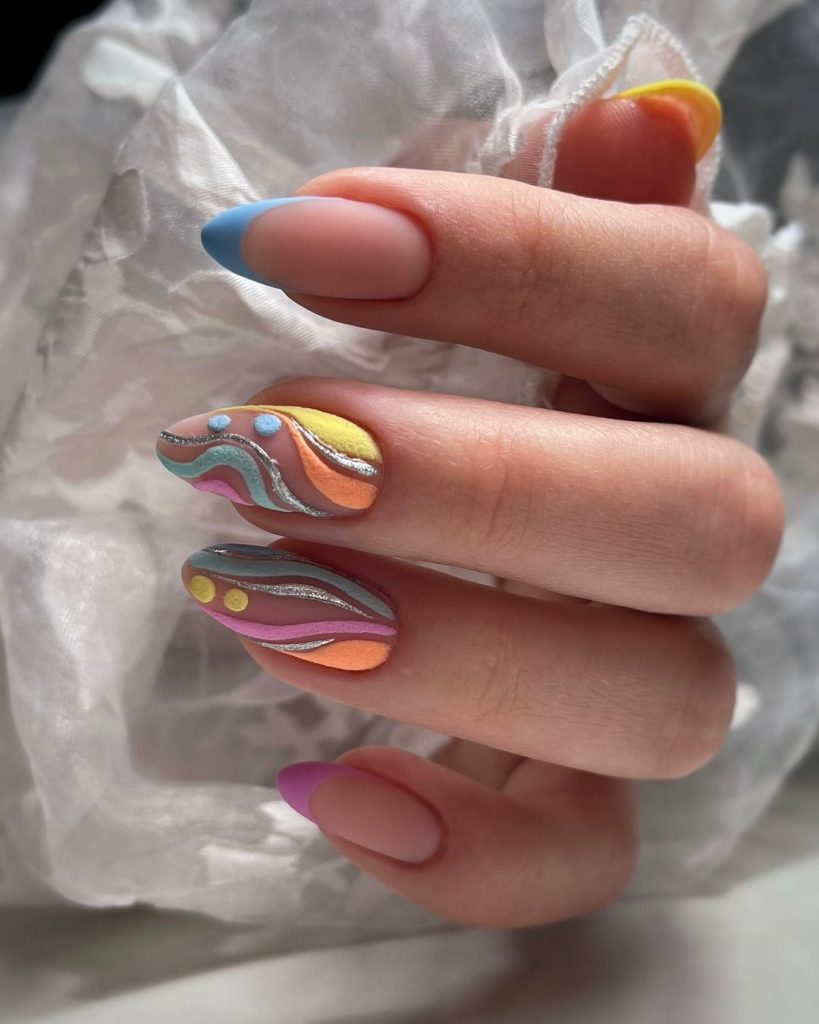
Summer Fantasy: Dreamy Color Waves
This design utilizes pastel tones to create dreamlike waves across the nails, incorporating bright and colorful elements that are perfect for any summer celebration. The artistic waves mimic the serene flow of ocean waves, ideal for a beach theme.
Consumables:
-
- Base Coat: Zoya Anchor Base Coat
- Pastel Polishes: Zoya Pastel Collection
- Detailing Brush: Fine tip nail art brush
- Glitter Accents: Small craft glitter
- Top Coat: Zoya Armor Top Coat
Begin with a neutral base. Apply pastel polishes in waves using the detailing brush. Before the polish dries, sprinkle a bit of glitter over the wet polish for a shimmering effect. Finish with a strong top coat to seal in the design and add extra shine.
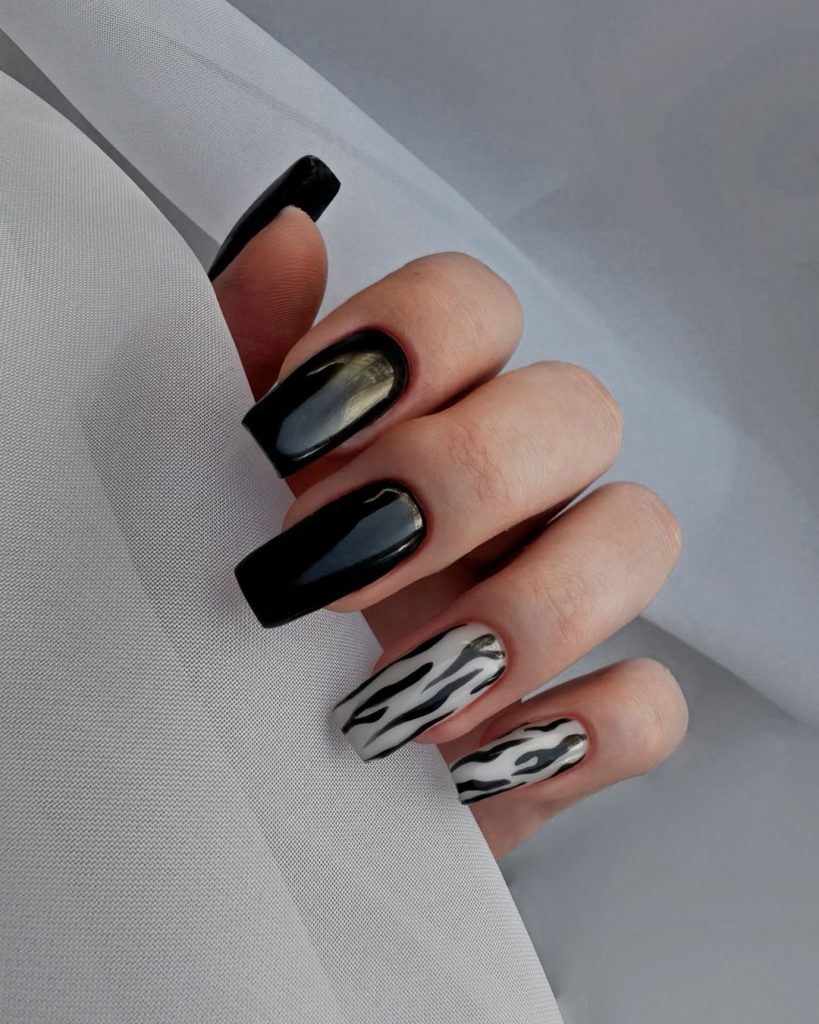
Sleek and Sophisticated: Modern Monochrome
This nail design uses a monochrome palette to create a sleek, sophisticated look that is both modern and timeless. The blend of matte black, glossy black, and silver accents makes this a perfect choice for those who embrace a minimalist yet bold style.
Consumables:
-
- Base Coat: OPI Matte Nail Envy
- Black Polish: China Glaze “Liquid Leather”
- Silver Polish: Essie “No Place Like Chrome”
- Matte Top Coat: Essie Matte About You
- Glossy Top Coat: Revlon Extra Life No Chip Top Coat
Apply a matte base coat to create a smooth surface. Paint the nails alternately with matte and glossy black polishes. For the silver nails, use a metallic polish and a thin brush to create freeform strokes. Finish the matte nails with a matte top coat and the glossy nails with a shiny top coat for contrast.
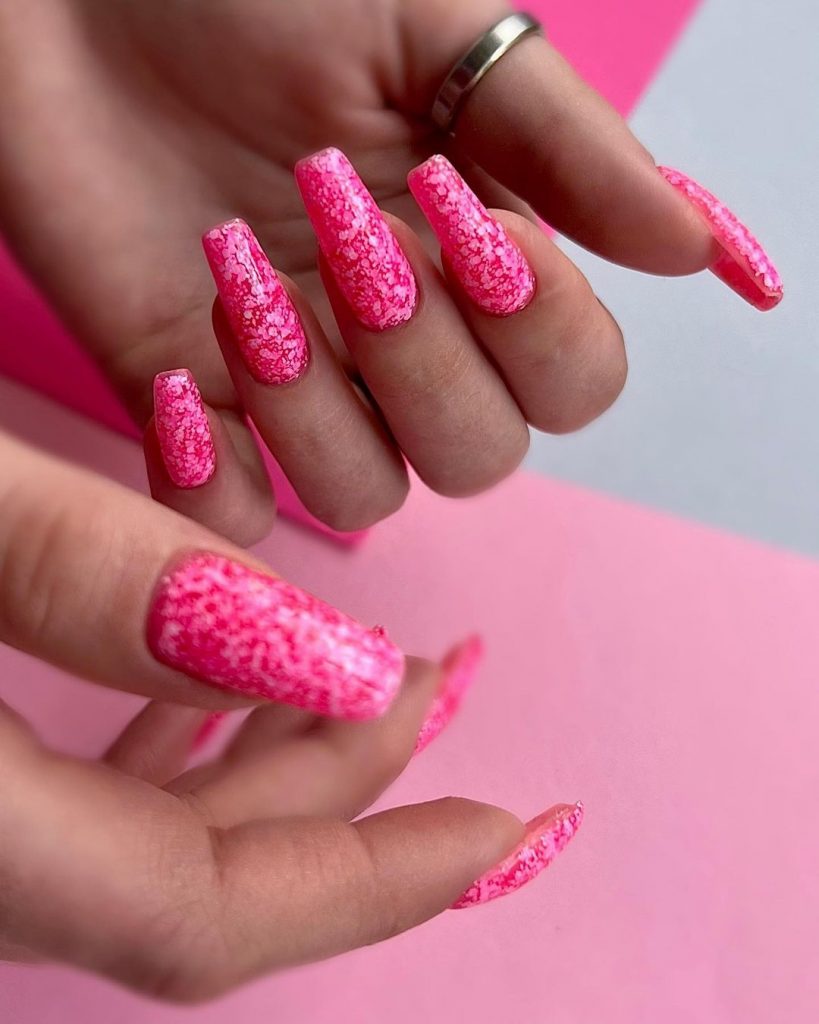
Vibrant and Textured: Hot Pink Sugar
Embrace the bright side of summer with these vibrant hot pink nails, featuring a unique sugary texture that adds an interesting tactile element to the look. This is perfect for a fun day out or a festive summer party.
Consumables:
-
- Base Coat: Sally Hansen Hard as Nails
- Pink Polish: OPI “Kiss Me I’m Brazilian”
- Sugar Effect: Pink craft sand or textured polish
- Top Coat: Sally Hansen Insta-Dri Anti-Chip Top Coat
Start with a strong base coat to protect your nails. Apply two coats of hot pink polish and while still wet, sprinkle pink craft sand over the nails or dab with a textured polish. Allow it to set and seal with a top coat to keep the texture in place and to add a shine that lasts.
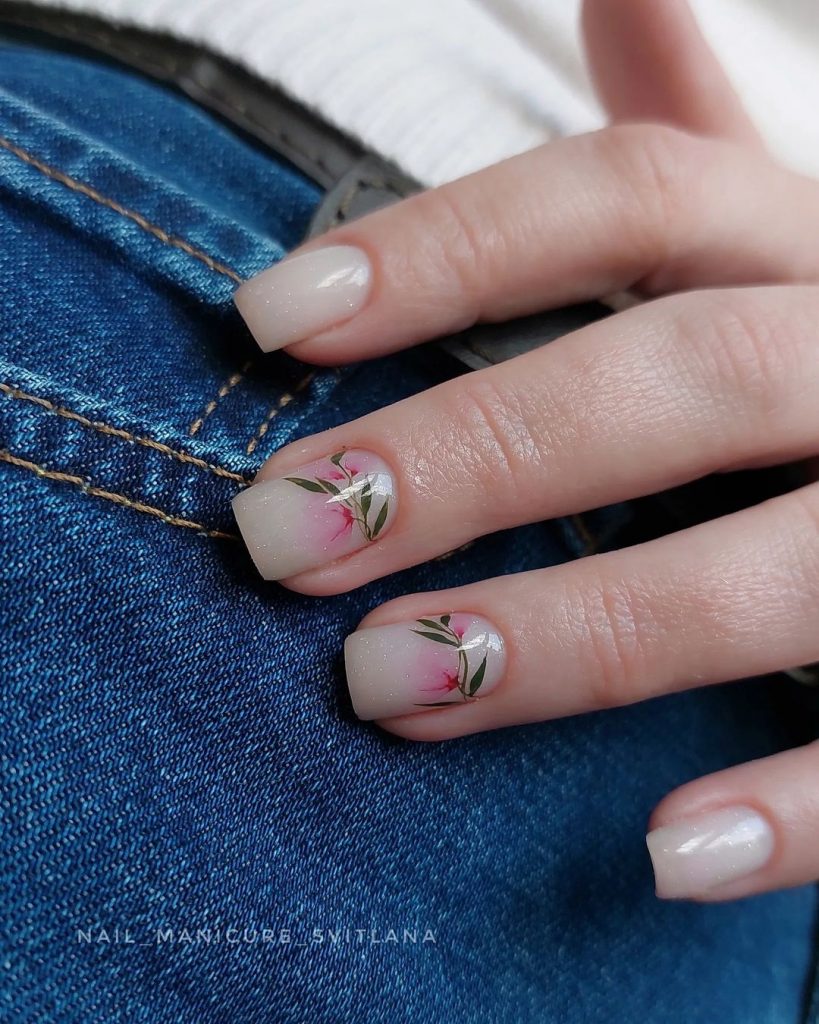
Delicate and Floral: Soft Pink Blossoms
This design features soft pink polish as a base with delicate floral designs and minimalistic green accents, creating a look of gentle beauty perfect for a light, airy summer vibe.
Consumables:
-
- Base Coat: Base Coat by ORLY Bonder
- Pink Polish: Essie “Ballet Slippers”
- Green Polish for detailing: Essie “Mint Candy Apple”
- Detailing Brush: Fine tip nail art brush
- Top Coat: CND Vinylux Weekly Top Coat
Apply the base coat followed by two layers of soft pink polish. Use a fine detailing brush to paint small blossoms and add green leaves for a natural touch. Finish with a top coat to enhance the design’s durability and shine.
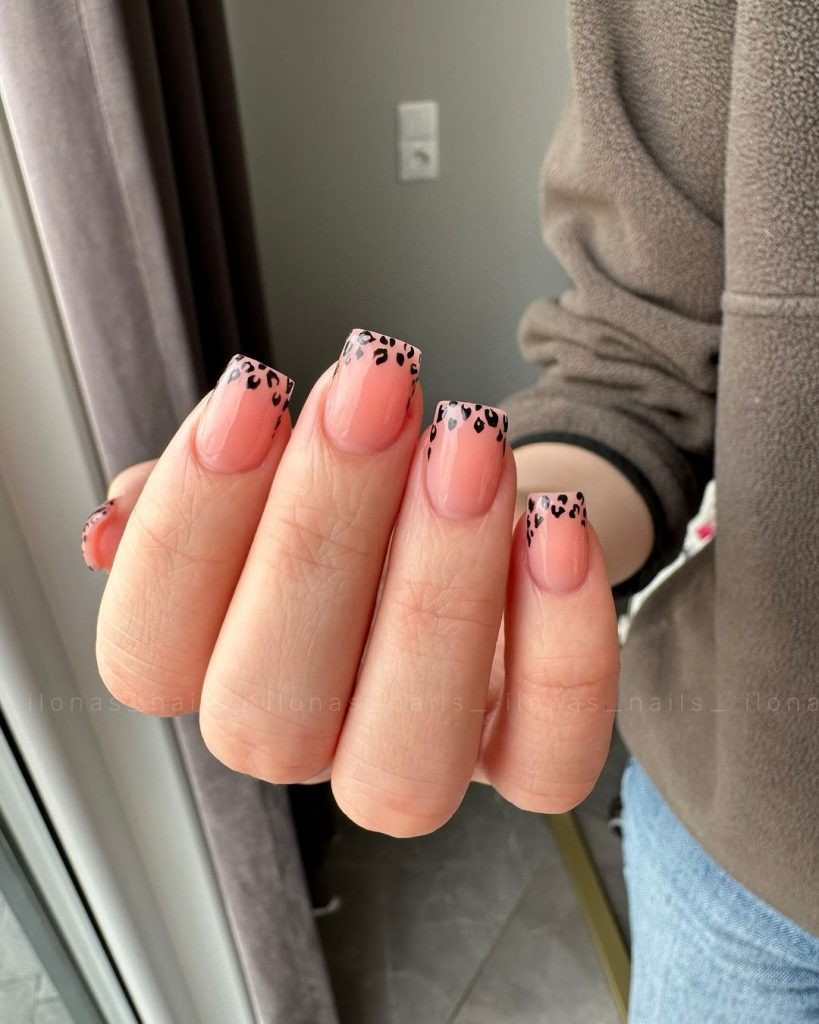
Trendy and Playful: Pink Leopard Print
Unleash your wild side with these playful pink leopard print nails. The combination of a soft pink base with bold black spots gives a modern twist to the classic leopard pattern, making it both cute and trendy.
Consumables:
-
- Base Coat: Essie Grow Stronger
- Pink Polish: Essie “Fiji”
- Black Polish for spots: Essie “Licorice”
- Dotting Tool or small brush
- Top Coat: Seche Vite Dry Fast Top Coat
Start with a base coat, then apply a soft pink polish as the base color. Use a dotting tool or small brush to create random black spots. Don’t aim for perfection; irregular shapes make it more authentic. Seal everything with a fast-drying top coat for a glossy finish.
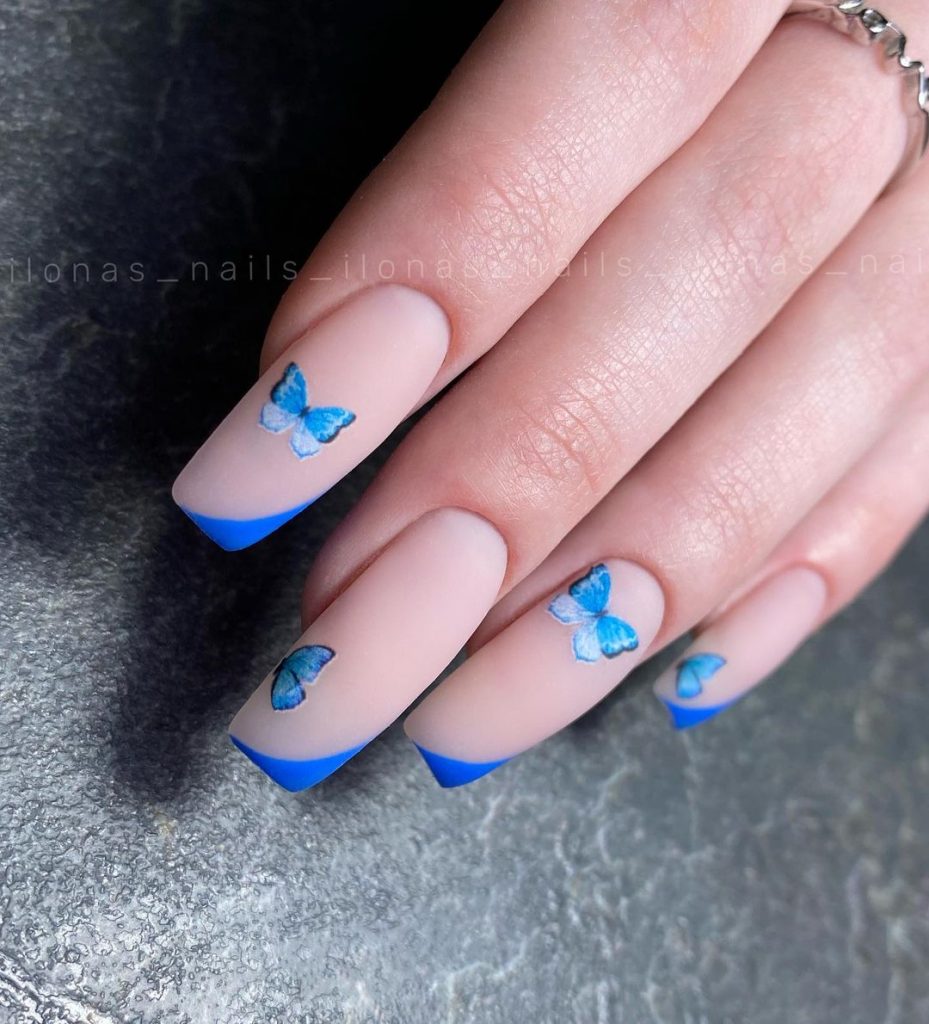
Charming and Chic: Blue Butterfly Tips
This design features elegant nude nails with bold blue tips, adorned with delicate butterfly accents. It’s perfect for those who love to add a whimsical touch to their style, combining simplicity with a pop of color.
Consumables:
-
- Base Coat: OPI Natural Nail Base Coat
- Nude Polish: Zoya “Avery”
- Blue Polish: Essie “Butler Please”
- Butterfly Stickers or hand-painted with a fine brush
- Top Coat: INM Out the Door
Apply a nude base coat and once dry, paint the tips with a vibrant blue polish. Apply butterfly stickers or hand-paint them at the junction of the nude and blue colors. Finish with a top coat to seal the design and add a glossy look.
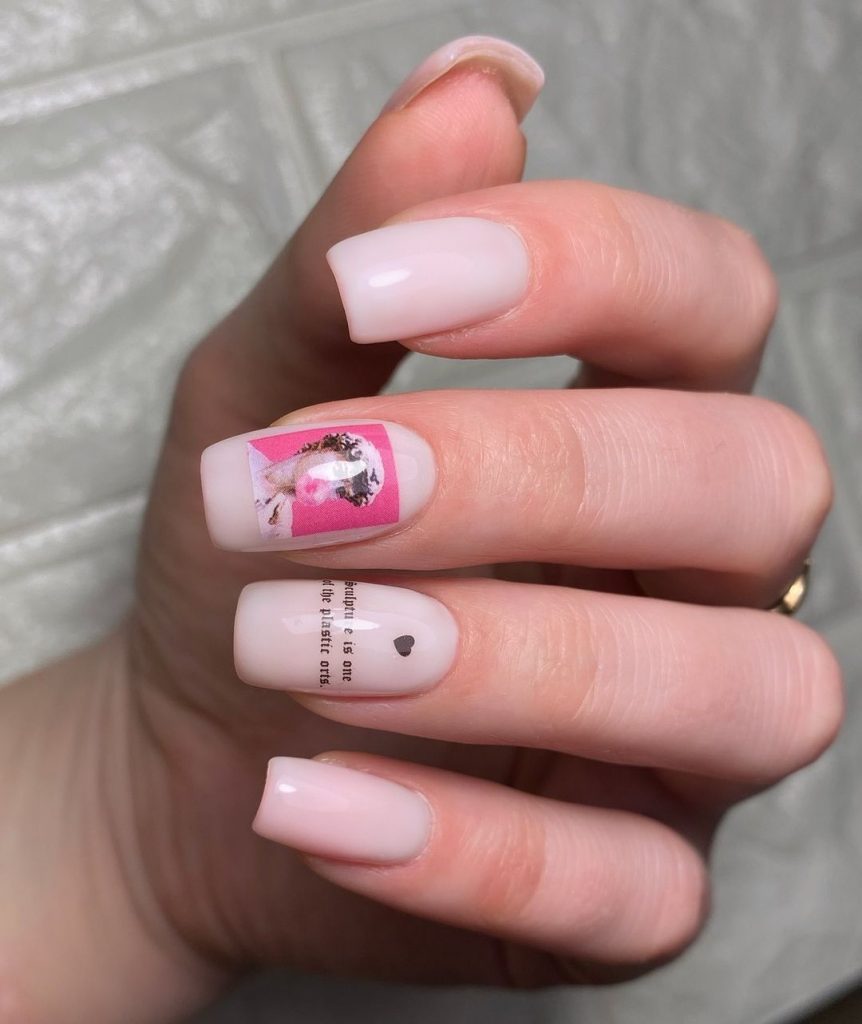
Elegant Simplicity with a Twist of Art
This nail design combines the classic soft pink with an artistic twist, featuring a unique photo and text overlay on a stark white base. It’s a perfect blend of minimalism and expressive art, ideal for those who appreciate a subtle narrative in their style.
Consumables:
-
- Base Coat: Essie Strong Start
- Pink Polish: OPI “Bubble Bath”
- White Polish: Sally Hansen “White On”
- Photo Decals
- Detailing Brush
- Top Coat: Seche Vite Dry Fast Top Coat
Start by applying a base coat to protect your nails. Paint the pinky and index nails with a soft pink polish, and the remaining nails in white as the base for the decals. Apply the photo decals carefully, smoothing out any bubbles or wrinkles. Seal everything with a top coat for a glossy, durable finish.
Vibrant Easter Egg Inspiration
Celebrate the festive spirit of Easter with this vibrant design inspired by Easter egg decorations. This design features playful polka dots and pastel colors, creating a fun and festive look perfect for any springtime gathering.

Consumables:
-
- Base Coat: OPI Natural Nail Base Coat
- Pastel Polishes: Various colors from Essie’s Spring Collection
- Dotting Tool
- Top Coat: Sally Hansen Insta-Dri Top Coat
Apply a base coat to all nails. Use different pastel colors as the base for each nail. Once dry, use a dotting tool to add polka dots in contrasting colors for a multi-colored effect. Finish with a quick-dry top coat to protect your design and add shine.
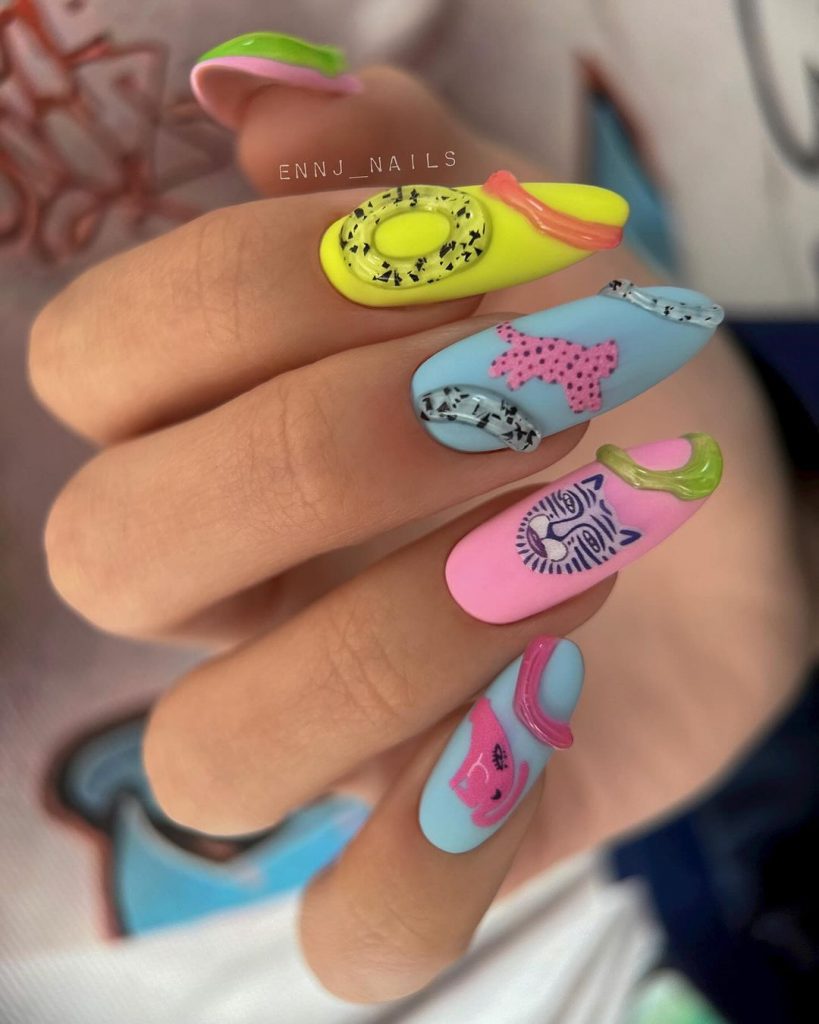
Playful and Creative: Mixed Media Manicure
This nail art showcases a playful mix of colors and designs, featuring bright neon tones and whimsical drawings. It’s a creative and eye-catching look that combines various artistic elements, perfect for those who like to express their quirky side.
Consumables:
-
- Base Coat: ORLY Bonder Rubberized Basecoat
- Neon Polishes: Models Own Neon Collection
- Black Fine Liner for details
- Stickers and Decals
- Top Coat: INM Out the Door Top Coat
Apply a base coat for longevity. Paint each nail with a different neon color as the base. Use a fine liner to add details and accentuate features with black lines. Apply stickers or decals as desired. Complete the look with a fast-drying top coat to enhance the vibrancy.
Subtle and Chic: Lavender Charm
This elegant design features a lovely lavender base with detailed floral accents, providing a chic and sophisticated look. It’s perfect for a subtle yet stylish expression suitable for both day and night occasions.

Consumables:
-
- Base Coat: CND Sticky Base Coat
- Lavender Polish: Essie “Go Ginza”
- White Polish for details: Essie “Blanc”
- Detailing Brush
- Top Coat: OPI Glossy Top Coat
Start with a base coat to protect your nails. Apply two coats of lavender polish as the base. Use a white polish and a detailing brush to carefully draw the floral designs. Finish with a glossy top coat for a smooth and shiny appearance.
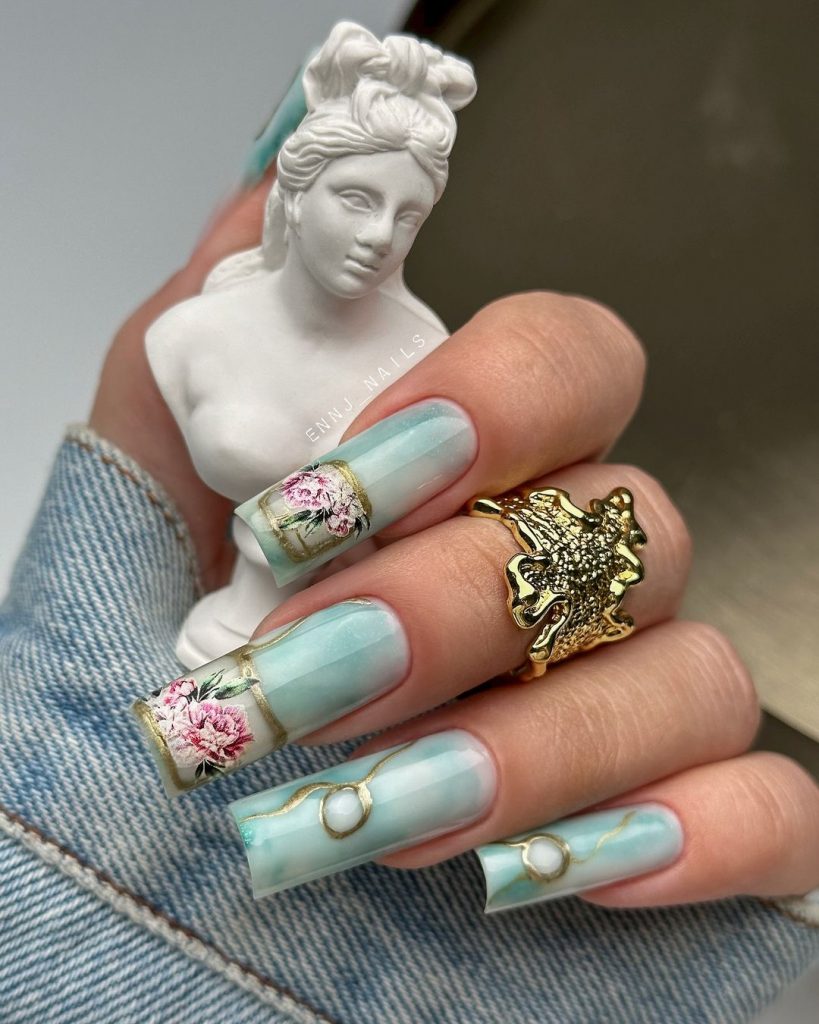
Sophisticated Artistry: Classical Inspiration
This nail design draws inspiration from classical art, featuring soft pastel gradients and detailed floral artwork. The sophisticated use of colors and the delicate detailing make this a standout choice for anyone who loves a refined and artistic look.
Consumables:
-
- Base Coat: Zoya Anchor Base Coat
- Pastel Gradient Polishes: Zoya Pastel Collection
- Floral Decals or Hand-Painted Art
- Gold Leafing for accents
- Top Coat: Zoya Armor Top Coat
Begin with a base coat to ensure a smooth canvas. Create a pastel gradient by softly blending different pastel shades on each nail. Apply floral decals or hand-paint intricate floral designs. Add small pieces of gold leaf for a touch of luxury. Seal the design with a top coat for durability and shine.
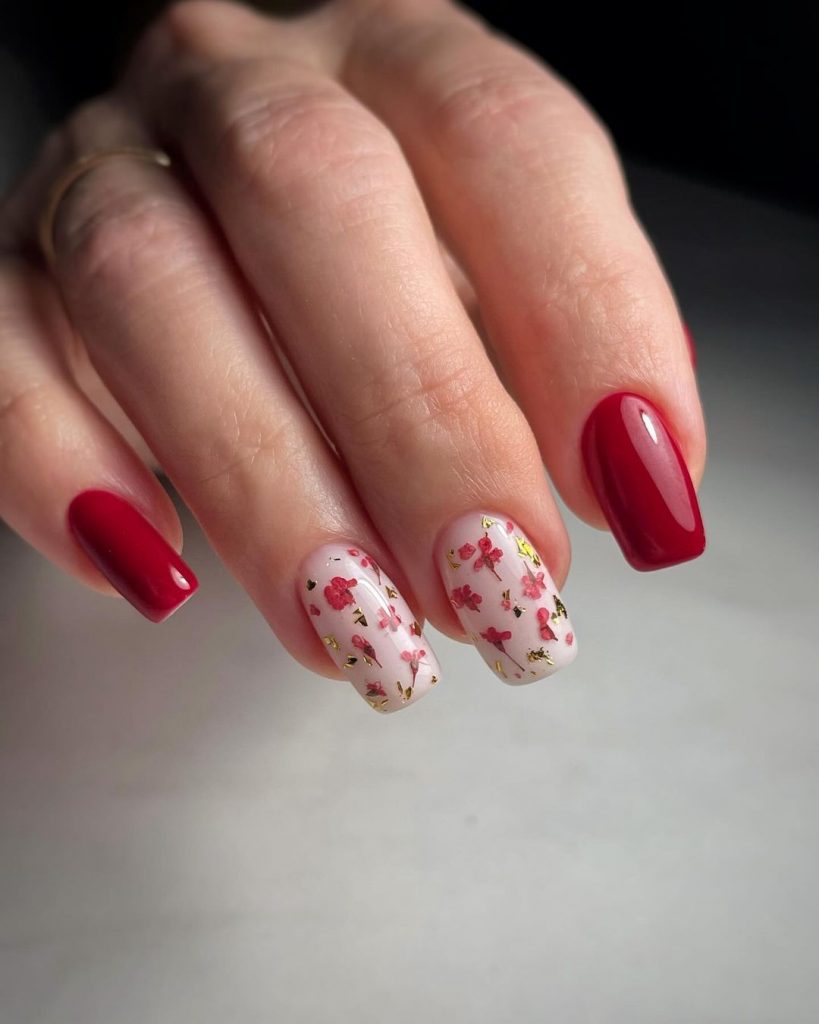
Romantic Reds and Floral Accents
This nail design features deep red polish on some nails, combined with a romantic floral pattern on a white background on others. It’s a classic look that’s perfect for any elegant occasion or a romantic evening out.
Consumables:
-
- Base Coat: OPI Natural Nail Base Coat
- Red Polish: Essie “Really Red”
- White Polish: Sally Hansen “White On”
- Floral Stickers or Hand-Painted Decals
- Top Coat: Seche Vite Dry Fast Top Coat
Apply the base coat to protect your nails. Paint the thumb, index, and pinky fingers in deep red. Use white polish on the middle and ring fingers as the base for your floral designs. Apply floral stickers or hand-paint the flowers using fine brushes and colored polishes. Finish with a top coat for a glossy, durable look.
Elegant Geometric Chic
This sophisticated design combines a soft white base with subtle geometric patterns and a splash of lavender for a touch of elegance. The added gemstone effect provides a luxurious finish, making it ideal for special occasions.

Consumables:
-
- Base Coat: Essie Grow Stronger
- White Polish: OPI “Alpine Snow”
- Lavender Polish: Essie “Lilacism”
- Fine Detail Brush or Striping Tape
- Gemstone Stickers
- Top Coat: OPI Glossy Top Coat
Start with a strong base coat. Paint all nails white, then use lavender polish with a detail brush or striping tape to create delicate geometric patterns. Add gemstone stickers for an extra touch of glamour. Finish with a glossy top coat to enhance the overall shine and durability.
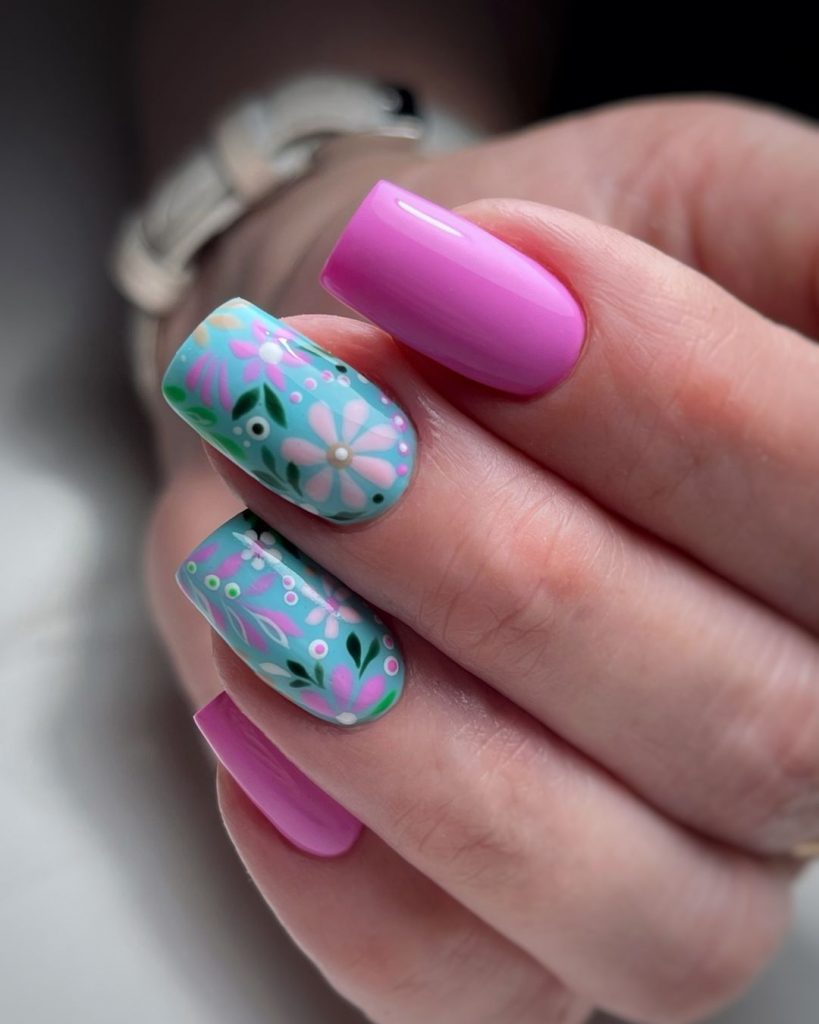
Vibrant Floral Fantasy
This playful and vibrant nail design features bright pink and teal backgrounds with white and pink floral patterns, perfect for spring and summer. It’s an eye-catching look that’s both fun and fashionable.
Consumables:
-
- Base Coat: OPI Natural Nail Base Coat
- Pink Polish: Essie “Mod Square”
- Teal Polish: China Glaze “Too Yacht to Handle”
- White Polish for Floral Details: Sally Hansen “White On”
- Detailing Brush
- Top Coat: INM Out the Door
Apply the base coat to all nails. Use bright pink polish on some nails and teal on others as the base colors. Once dry, use a fine brush to add floral details in white on the teal base and pink on the pink base. This contrasting detail brings out the vibrant colors. Finish with a fast-drying top coat to protect and set the design.
Save Pin
