
Winter Nails Gel 2024 – 2025: Top 23 Classy and Pretty Short Almond Design Ideas
Winter is upon us, and with it comes the opportunity to embrace the magic of winter nails gel 2024 – 2025. This year, the trends are shifting towards elegant, classy, and sometimes bold choices that highlight the season’s essence. From short almond designs to French tips manicure ideas short, there’s something for everyone. Let’s dive into the top nail designs for the winter of 2024-2025, and how you can recreate these styles at home.
Festive French Tips with Snowflakes and Hearts
The first design showcases a timeless yet festive French tips manicure with intricate winter detailing. The nails feature short almond shapes, which not only look classy but are also practical for everyday wear. The base is a soft neutral color, accented by delicate white snowflake designs and a bold red heart on the ring finger, adding a romantic winter touch. This design is perfect for those who want a simple yet charming look, balancing subtlety with a pop of color.

Consumables:
- Base color: OPI GelColor “Bubble Bath” for the neutral base.
- White detailing: OPI GelColor “Alpine Snow” for the snowflakes and French tips.
- Red heart: Essie Gel Couture “Bubbles Only” for the vibrant red accent.
- Top coat: Seche Vite for a long-lasting, glossy finish.
How to Create This Look:
- Start with shaping your nails into short almond shapes.
- Apply the neutral base coat and cure under a UV lamp.
- Using a thin brush, draw delicate snowflakes on select nails with the white gel polish.
- For the red heart, use a dotting tool to form the heart outline, then fill it in.
- Finish with a glossy top coat and cure for a sleek finish.
Holiday Plaid Nails with Snowflakes and Bows
This design captures the festive spirit of the season with bold red and white colors, combined with playful patterns. The use of a solid red color on the base with white snowflakes and a tiny bow adds a classy sparkle to the look. It’s ideal for those who love the holiday spirit and want a French tips manicure ideas style with a creative twist.

Consumables:
- Base color: OPI GelColor “Big Apple Red.”
- White detailing: Gelish Gel Polish in “Snow Bunny.”
- Bow decoration: Small white bow charms from a nail art store.
- Top coat: Gelish Top It Off for a shiny, durable finish.
How to Create This Look:
- Shape your nails into an almond or oval style.
- Apply the red gel polish base and cure.
- Draw white snowflake patterns using a nail art brush, and attach the small bow charms using a dot of clear gel polish.
- Cure, then finish with a top coat for a classy and festive shine.
Winter Wonderland in Soft Pastels and Snowflakes
For a more understated yet intricate look, this nail design uses neutral and soft pastel colors with raised white accents resembling icicles and snowflakes. The oval-shaped nails lend themselves perfectly to this design, giving a chic, elongated look to the fingers. The matte finish on some nails contrasts beautifully with the glossy white snowflakes, making it both elegant and simple.

Consumables:
- Base colors: OPI GelColor in “Icelanded a Bottle of OPI” and “Funny Bunny” for the matte finish.
- White accents: Orly Gel FX “White Tips” for the snowflake detailing.
- Matte top coat: Essie Matte About You for the matte nails.
- Shiny top coat: OPI GelColor Top Coat for the glossy nails.
How to Create This Look:
- Shape your nails into oval or short almond shapes for a classy, neat look.
- Apply the neutral base coats and cure under a UV lamp.
- Use a detailing brush to draw the snowflakes and icicle effects on select nails with white gel polish.
- Finish with a matte top coat on some nails and a glossy coat on others to mix textures.
Candy Cane Stripes with Red Bows
This nail design brings a playful, candy-cane-inspired aesthetic perfect for the winter holidays. The use of red and white stripes, coupled with silver glitter accents, offers a classy sparkle look while remaining simple. The short almond nails keep the design practical yet bold, and the red bows add a festive touch.

Consumables:
- Base color: OPI GelColor in “Snow Glad I Met You.”
- Red accents: Essie Gel Couture “Drop the Gown.”
- Silver glitter: China Glaze “Silver Lining” for glitter detailing.
- Red bow charm: Available at most nail art stores.
- Top coat: Gelish Top It Off.
How to Create This Look:
- Shape nails into short almond.
- Apply the white base coat and cure.
- Using a nail striping brush, alternate red and silver glitter stripes for a candy-cane effect.
- Attach the red bow charm using a dot of gel and finish with a top coat.
Subtle Holly Berry with Glitter Accents
For those who prefer a more neutral and earthy look, this design features a nude base with minimal holly berry accents and a hint of festive glitter. The combination of solid color red glitter polish and hand-painted holly details makes this design pretty, without being overwhelming. The short oval shape keeps it practical for everyday wear while still having a holiday edge.

Consumables:
- Base color: OPI GelColor “Put it in Neutral.”
- Red glitter: Sally Hansen Miracle Gel “Red-y, Set, Run!”
- Green detailing: Essie Gel Couture “Jade to Measure” for the holly leaves.
- Top coat: Gelish Top It Off.
How to Create This Look:
- Shape nails into short oval.
- Apply the neutral base and cure.
- Use a fine brush to hand-paint holly leaves and berries, then apply red glitter polish on alternating nails.
- Finish with a top coat to seal the design and add shine.
Cute Winter Penguin and Snowflake Design
This adorable winter gel nail design captures the playful spirit of the season with a cute penguin accent on one nail, paired with a soft pastel palette. The design features a short almond shape, making it practical yet eye-catching. The use of matte light pink polish on two nails adds a neutral and simple base, while the penguin and snowflake art on the remaining nails add a playful, wintery flair. The subtle glitter on the snowflake nail gives the whole design a classy sparkle without being too flashy.

Consumables:
- Base colors: OPI GelColor “Mod About You” for the light pink matte base.
- Penguin design: Black and white gel polish (Essie Gel Couture “Licorice” and “Pre-Show Jitters”).
- Snowflake: White gel polish and silver glitter (Orly Gel FX “Mirrorball”).
- Top coat: OPI GelColor Matte Top Coat for the matte effect.
How to Create This Look:
- Shape nails into short almond.
- Apply the light pink matte base and cure under a UV lamp.
- Use a fine brush to hand-paint the penguin on one nail, adding details like the beak and eyes with precision tools.
- For the snowflake, apply white gel polish with a thin detailing brush, followed by a light dusting of silver glitter.
- Cure and apply a matte top coat to finish the look.
Forest Green French Tips with Sweater Texture
This nail design embraces a mix of textures and French tips manicure ideas short in a rich forest green. The short almond nails are versatile and practical, with the added twist of sweater-knit texture on the ring finger, perfect for cozy winter vibes. The combination of solid color green tips and the fun sweater detail creates a classy yet simple look that’s ideal for those who love understated designs with a touch of creativity.

Consumables:
- Base color: OPI GelColor “Bubble Bath” for the natural base.
- French tip: Essie Gel Couture “Off Tropic” for the forest green tips.
- Sweater design: Textured nail gel in green (Young Nails Gel).
- Top coat: Gelish Top It Off for a glossy finish.
How to Create This Look:
- Shape nails into short almond.
- Apply the natural base coat and cure.
- Using a striping brush, paint French tips on the desired nails in forest green and cure.
- For the sweater detail, use a thin brush and a textured gel to create raised lines, mimicking a knit pattern.
- Finish with a glossy top coat to seal everything in.
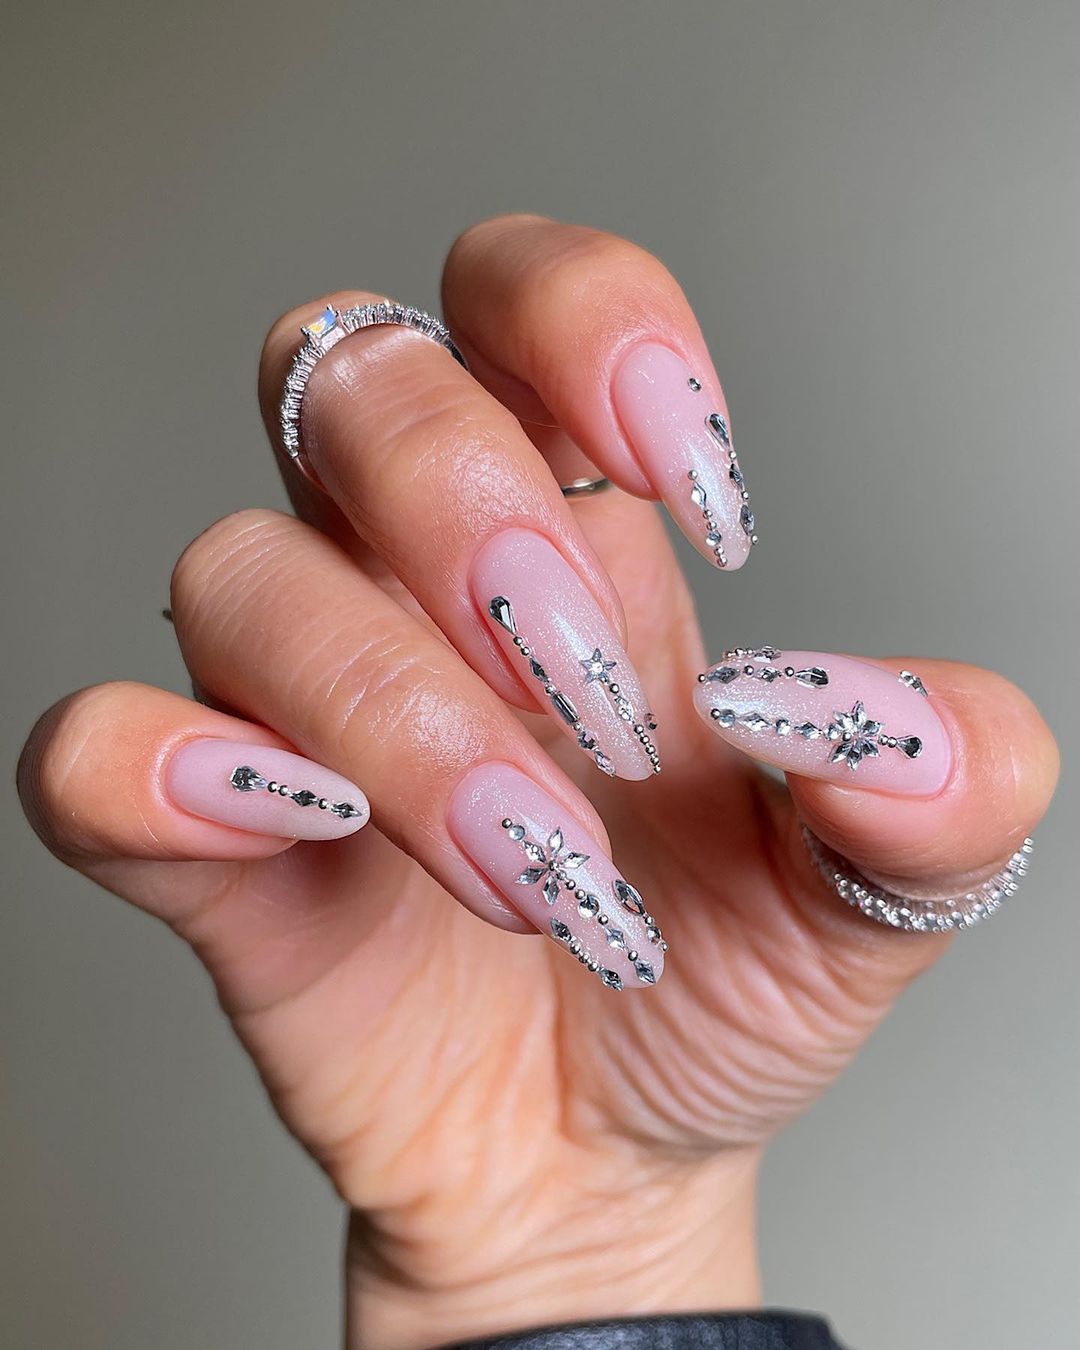
Nude Glitter and Snowflakes for a Classy Look
This elegant nail design features neutral nude tones with delicate snowflake accents and glitter for a classy sparkle. The long, coffin-shaped nails are both glamorous and sophisticated, with a hint of sparkle to capture the winter magic. The mix of solid color nudes with snowflake detailing offers a balanced design that’s perfect for formal occasions or holiday parties.

Consumables:
- Base color: OPI GelColor “Dulce de Leche” for the nude base.
- Glitter: OPI GelColor “Snowflakes in the Air” for a light glitter overlay.
- Snowflake design: White gel polish (Essie Gel Couture “Blanc”) and rhinestones for extra sparkle.
- Top coat: Seche Vite for a glossy, long-lasting finish.
How to Create This Look:
- Shape nails into long coffin styles.
- Apply the nude base coat and cure.
- Use a fine brush to create delicate snowflakes on select nails with white gel polish, adding rhinestones at the center for a sparkle effect.
- Apply a light dusting of glitter on alternating nails, cure, and finish with a top coat.
Sparkly Red French Tips
This design offers a modern twist on the classic French tips manicure by using a bold, glittery red on the tips of long square-shaped nails. The use of a solid color glittery red gives the design a festive and sophisticated vibe, perfect for the holiday season. Paired with a nude base, the red tips stand out, offering a classy and clean look while still feeling festive and playful.

Consumables:
- Base color: OPI GelColor “Bubble Bath” for the nude base.
- Red glitter tips: Essie Gel Couture “Rock the Runway” with a glitter overlay (China Glaze “Ruby Pumps”).
- Top coat: Gelish Top It Off for a high-gloss finish.
How to Create This Look:
- Shape nails into long square shapes.
- Apply the nude base coat and cure.
- Using a striping brush, paint red glitter tips on the nails, creating a clean French tip design.
- Cure and finish with a top coat to lock in the shine and glitter.
Christmas Tree and Green Winter Nail Art
This nail art design brings out the holiday spirit with festive Christmas-themed details, including a Christmas tree and holiday ornaments. The short almond nails are ideal for practical wear, with dark green polish complementing the hand-painted holiday details. The combination of solid color green nails with playful holiday accents adds both a classy and festive touch to this design.

Consumables:
- Base color: OPI GelColor “Don’t Bossa Nova Me Around” for the nude base.
- Green polish: Essie Gel Couture “Off Tropic” for the solid green nails.
- Holiday accents: Hand-painted with white, red, and green gel polishes for the ornaments and tree.
- Top coat: Seche Vite for a long-lasting, glossy finish.
How to Create This Look:
- Shape nails into short almond.
- Apply the nude base coat and cure.
- Paint two nails with solid green polish, leaving the others for hand-painted holiday accents using fine brushes.
- Finish with a top coat for a glossy, long-lasting finish.
Cute Polar Bear with Sweater Textures
This adorable winter nail design stands out with a mix of playful characters and trendy sweater texture. The vibrant purple base, paired with a hand-painted polar bear on one nail and a cozy knit pattern on another, brings warmth and fun to your winter nails. The design works well on short square nails, offering both a bold statement and a practical length for everyday wear.

Consumables:
- Base color: OPI GelColor “Do You Lilac It?”
- Polar bear detailing: White gel polish for the bear (Essie Gel Couture “Blanc”) and black gel polish for the eyes (Essie Gel Couture “Licorice”).
- Sweater texture: Textured gel polish (Young Nails “Sweater Weather”).
- Top coat: Gelish Top It Off.
How to Create This Look:
- Shape nails into short square.
- Apply the purple gel base coat and cure.
- Use a fine brush to hand-paint the polar bear on one nail, adding the small details like the hat and scarf.
- Create the sweater texture on one nail using textured gel and a thin brush to mimic knit patterns.
- Cure and finish with a top coat.
Purple Sparkle with Snowflake Art
This design embraces the beauty of winter with glittering purple nails and detailed white snowflake art. The solid color glitter gives the nails a classy sparkle, while the delicate snowflake patterns create a festive and elegant touch. The long coffin shape enhances the overall dramatic look, perfect for winter events or just adding a festive vibe to your daily life.

Consumables:
- Base color: Essie Gel Couture “Love is in the Air.”
- Purple glitter: OPI GelColor “Show Us Your Tips.”
- Snowflake design: White gel polish for snowflakes (OPI GelColor “Alpine Snow”).
- Top coat: Seche Vite for a glossy finish.
How to Create This Look:
- Shape nails into long coffin.
- Apply the purple glitter gel base and cure.
- Use a detailing brush to create intricate white snowflakes on two nails, and add smaller dots to mimic falling snow.
- Cure and finish with a top coat.
Icy Blue Reindeer and Snowflakes
A fun and festive choice for the holidays, this icy blue nail design features a playful reindeer paired with textured snowflakes. The long stiletto shape offers a bold canvas for the various elements, including the hand-drawn reindeer and raised snowflakes. The light blue base and white accents perfectly capture a frosty winter vibe, making these nails a standout choice for the season.

Consumables:
- Base color: OPI GelColor “It’s a Boy!” for the light blue base.
- White details: Orly Gel FX “White Tips” for the snowflakes.
- Reindeer art: Hand-painted with gel polish (red, white, and black) for detailed features.
- Textured snowflakes: Use textured gel polish for raised effects.
- Top coat: Seche Vite for a long-lasting finish.
How to Create This Look:
- Shape nails into long stiletto.
- Apply the light blue base coat and cure.
- Use a fine detailing brush to hand-paint the reindeer on one nail and add the snowflakes on the others, incorporating textured gel for a raised effect.
- Cure and finish with a top coat for added shine.
Festive Pink and White Gift Wrap Design
This design feels like a gift in itself, with a creative use of soft pinks, whites, and glitter to mimic wrapped presents. The sweater texture combined with the intricate bow details on a long square shape gives the design a festive yet refined look. The addition of white snowflakes and glitter accents adds to the wintery, holiday theme without being too over-the-top.

Consumables:
- Base color: OPI GelColor “I Pink I Love You” for the soft pink base.
- White detailing: OPI GelColor “Alpine Snow” for the bows and snowflakes.
- Glitter: China Glaze “Fairy Dust” for the glitter accents.
- Sweater texture: Use textured gel for the raised effects.
- Top coat: Essie Gel Couture Top Coat.
How to Create This Look:
- Shape nails into long square.
- Apply the soft pink base coat and cure.
- Use a fine brush to create white bows and snowflakes, adding glitter to accentuate the festive look.
- For the sweater texture, use textured gel to create raised lines and patterns.
- Cure and finish with a top coat.
Rhinestone Snowflake Glam
This design brings an elegant winter vibe with subtle nude tones adorned with rhinestones and snowflake designs. The short almond shape enhances the sophisticated feel, and the rhinestones add a touch of glamour. The use of solid color nude paired with sparkling accents makes this an ideal look for winter parties or formal events.

Consumables:
- Base color: OPI GelColor “Put it in Neutral.”
- Rhinestones: Swarovski crystals in various sizes for the snowflake and accent designs.
- White snowflakes: Essie Gel Couture “Blanc.”
- Top coat: Gelish Top It Off for a durable shine.
How to Create This Look:
- Shape nails into short almond.
- Apply the nude base coat and cure.
- Arrange rhinestones on the nails to form snowflake patterns, securing them with clear gel.
- Add small white snowflake details with a fine brush, then cure and finish with a top coat for long-lasting shine.
Ombre Blue with Heart Accents
This design combines a soft ombre transition from nude to vibrant teal, enhanced with delicate heart-shaped accents and rhinestones. The long square shape offers a modern look, while the minimalist heart design adds a playful touch to the otherwise sleek and professional feel. The contrast between the bold blue and subtle nude makes this a standout look for winter.

Consumables:
- Base color: OPI GelColor “Put it in Neutral.”
- Ombre blue: OPI GelColor “I Sea You Wear OPI.”
- Heart accents: Red gel polish for the hearts.
- Rhinestones: Swarovski crystals for extra sparkle.
- Top coat: Seche Vite for a high-gloss finish.
How to Create This Look:
- Shape nails into long square.
- Apply the nude base coat and create the ombre effect with a sponge, blending the nude into the blue.
- Use a fine brush to draw red heart accents on one or two nails, and add rhinestones to the ring finger for a bit of shine.
- Cure and finish with a top coat.
Textured French Tips in Earthy Tones
This nail design brings a unique twist to the traditional French tips by using a variety of earthy tones like sage, gray, and terracotta, each with a textured knit pattern. The short almond shape allows for a subtle yet creative look, ideal for those who want to incorporate natural colors into their winter nails while staying on-trend with textured accents.

Consumables:
- Base color: Essie Gel Couture “Pre-Show Jitters” for the nude base.
- French tip colors: OPI GelColor “Sage Scarf,” “Terracotta,” and “Gray-t to Be Here.”
- Textured gel: Young Nails “Sweater Weather” for raised effects.
- Top coat: OPI GelColor Top Coat for a glossy finish.
How to Create This Look:
- Shape nails into short almond.
- Apply the nude base coat and cure.
- Use different earthy tones for each nail’s French tip, and add textured gel patterns to some tips for a sweater-knit effect.
- Cure and finish with a top coat for a polished look.
Winter Blue Penguin with Snowflakes
This design is both whimsical and festive, featuring a cute penguin in a blue winter hat along with white snowflakes on a bright blue background. The long stiletto shape provides a dramatic canvas for this winter-themed design. The raised texture on the penguin’s hat and sweater adds depth, making this a fun and detailed winter manicure.

Consumables:
- Base color: OPI GelColor “No Room for the Blues.”
- Penguin design: Hand-painted using black, white, and yellow gel polish (Essie Gel Couture “Blanc,” “Licorice”).
- Snowflake accents: Orly Gel FX “White Tips.”
- Textured gel: Young Nails “Sweater Weather” for raised effects.
- Top coat: Seche Vite for a glossy finish.
How to Create This Look:
- Shape nails into long stiletto.
- Apply the blue base coat and cure.
- Hand-paint the penguin using black, white, and yellow gel polish, and add snowflake accents on other nails.
- Use textured gel for the penguin’s hat and sweater to create a raised effect.
- Cure and finish with a top coat.
Santa Suit and Gold Glam Mix
This design embraces the holiday spirit with a fun Santa suit on two nails and a glamorous gold finish on the others. The short almond shape keeps the look practical, while the mix of matte red and sparkling gold ensures the nails feel festive. The cartoon-like Santa suit design brings a playful element, contrasting with the elegance of the gold polish.

Consumables:
- Base color: Essie Gel Couture “Rock the Runway” for the red nails.
- Gold glitter: OPI GelColor “Goldeneye.”
- Santa suit accents: Hand-painted with black and white gel polish (OPI GelColor “Alpine Snow” and “Licorice”).
- Top coat: Gelish Matte Top It Off for the red nails, and Seche Vite for the gold nails.
How to Create This Look:
- Shape nails into short almond.
- Apply the red base coat to the Santa suit nails, and gold glitter to the others.
- Hand-paint the Santa suit details using black and white gel polish.
- Cure and finish the red nails with a matte top coat, and the gold nails with a glossy top coat.
Cute Snowman and Snowflake Art
This playful design features a cute snowman surrounded by snowflakes on a short square canvas. The light blue base creates a frosty, wintery background, while the black and orange accents of the snowman add a charming touch. The detailed snowflakes make the design feel intricate, perfect for winter lovers who want a simple yet pretty look.

Consumables:
- Base color: OPI GelColor “Suzi Without a Paddle.”
- Snowman details: Hand-painted with black and orange gel polish (Essie Gel Couture “Licorice” and “Tangerine Tease”).
- Snowflake accents: White gel polish (Orly Gel FX “White Tips”).
- Top coat: Seche Vite for a glossy finish.
How to Create This Look:
- Shape nails into short square.
- Apply the light blue base coat and cure.
- Hand-paint the snowman and snowflakes using a fine brush.
- Cure and finish with a top coat for extra shine.
Golden Snowflake and Glitter Accent
This festive winter design is a beautiful blend of elegance and holiday sparkle. The short square shape nails are adorned with delicate white snowflakes on a nude base, while the golden glitter on the accent nails adds a pop of glamour. The combination of solid color glitter and intricate snowflakes creates a perfect holiday look that’s classy yet eye-catching.

Consumables:
- Base color: OPI GelColor “Bubble Bath” for the nude base.
- White snowflakes: Essie Gel Couture “Blanc.”
- Gold glitter: OPI GelColor “Goldeneye” for the accent nails.
- Top coat: Gelish Top It Off for a high-gloss finish.
How to Create This Look:
- Shape nails into short square.
- Apply the nude base coat and cure.
- Hand-paint white snowflakes on select nails using a fine detailing brush.
- Apply gold glitter to the accent nails for a festive touch, then cure.
- Finish with a top coat to lock in the shine and protect the design.
Festive Red Plaid and Hedgehog Design
This playful and cozy design features a combination of plaid, glitter, and a cute hedgehog accent. The short almond-shaped nails are ideal for those who want to experiment with patterns and textures, offering a fun and festive look. The plaid red-and-gold design paired with glitter details and hand-painted hedgehogs gives this manicure a whimsical yet stylish edge.

Consumables:
- Base color: Essie Gel Couture “Flashed.”
- Plaid details: Hand-painted with gold and black gel polish.
- Hedgehog design: Hand-painted using white and brown gel polish.
- Glitter accents: China Glaze “Golden Enchantment” for glitter detailing.
- Top coat: Seche Vite for a glossy, long-lasting finish.
How to Create This Look:
- Shape nails into short almond.
- Apply the red base coat and cure.
- Hand-paint the plaid pattern and the hedgehog using fine brushes.
- Add glitter accents to selected nails for a festive sparkle, then cure.
- Finish with a top coat to seal the design.
Red and White Christmas Sweater Nails
This festive design brings the holiday spirit with a red and white color palette and cozy sweater texture. The short square shape allows the design to be both practical and stylish, perfect for holiday gatherings or simply celebrating the season. The raised sweater texture on the accent nail adds depth, while the red matte finish keeps the look classy and simple.

Consumables:
- Base color: OPI GelColor “Big Apple Red.”
- White snowflake accents: Orly Gel FX “White Tips.”
- Sweater texture: Textured gel polish for raised effects.
- Top coat: Essie Matte About You for a matte finish.
How to Create This Look:
- Shape nails into short square.
- Apply the red base coat and cure.
- Hand-paint the white snowflakes and use textured gel for the sweater pattern.
- Cure and finish with a matte top coat to complete the look.
Save Pin
